
Nettle love is when you can't get enough of this newly emerged, freshly cooked, wild vegetable. This perennial plant of the Urticaceae family is one of the first to show up once spring arrives. And it's so easy to prepare: just saute or steam it. Or substitute nettle for kale or spinach in your favorite cooked recipes. I love to make frittatas, and nettle frittatas are one of my favorites (see recipe below).
Nettle leaf has a rich, hearty (meaty), deep-green flavor. It is a blood-building, vitamin- and mineral-rich tonic food, especially high in calcium, magnesium and iron. Nettle is fiery. Use it to support circulation and resolve wet cold conditions in the respiratory system. It supports kidney and adrenal function and is used for improving skin, hair, joints, allergies and arthritic conditions. In addition to all these gifts, let's not forget the place nettle has as a gourmet vegetable to be eaten with breakfast, lunch or dinner. However, keep in mind that too much can be irritating/ stimulating to some enthusiastic nettle eaters (myself included). One serving a day hasn't caused any harm yet.
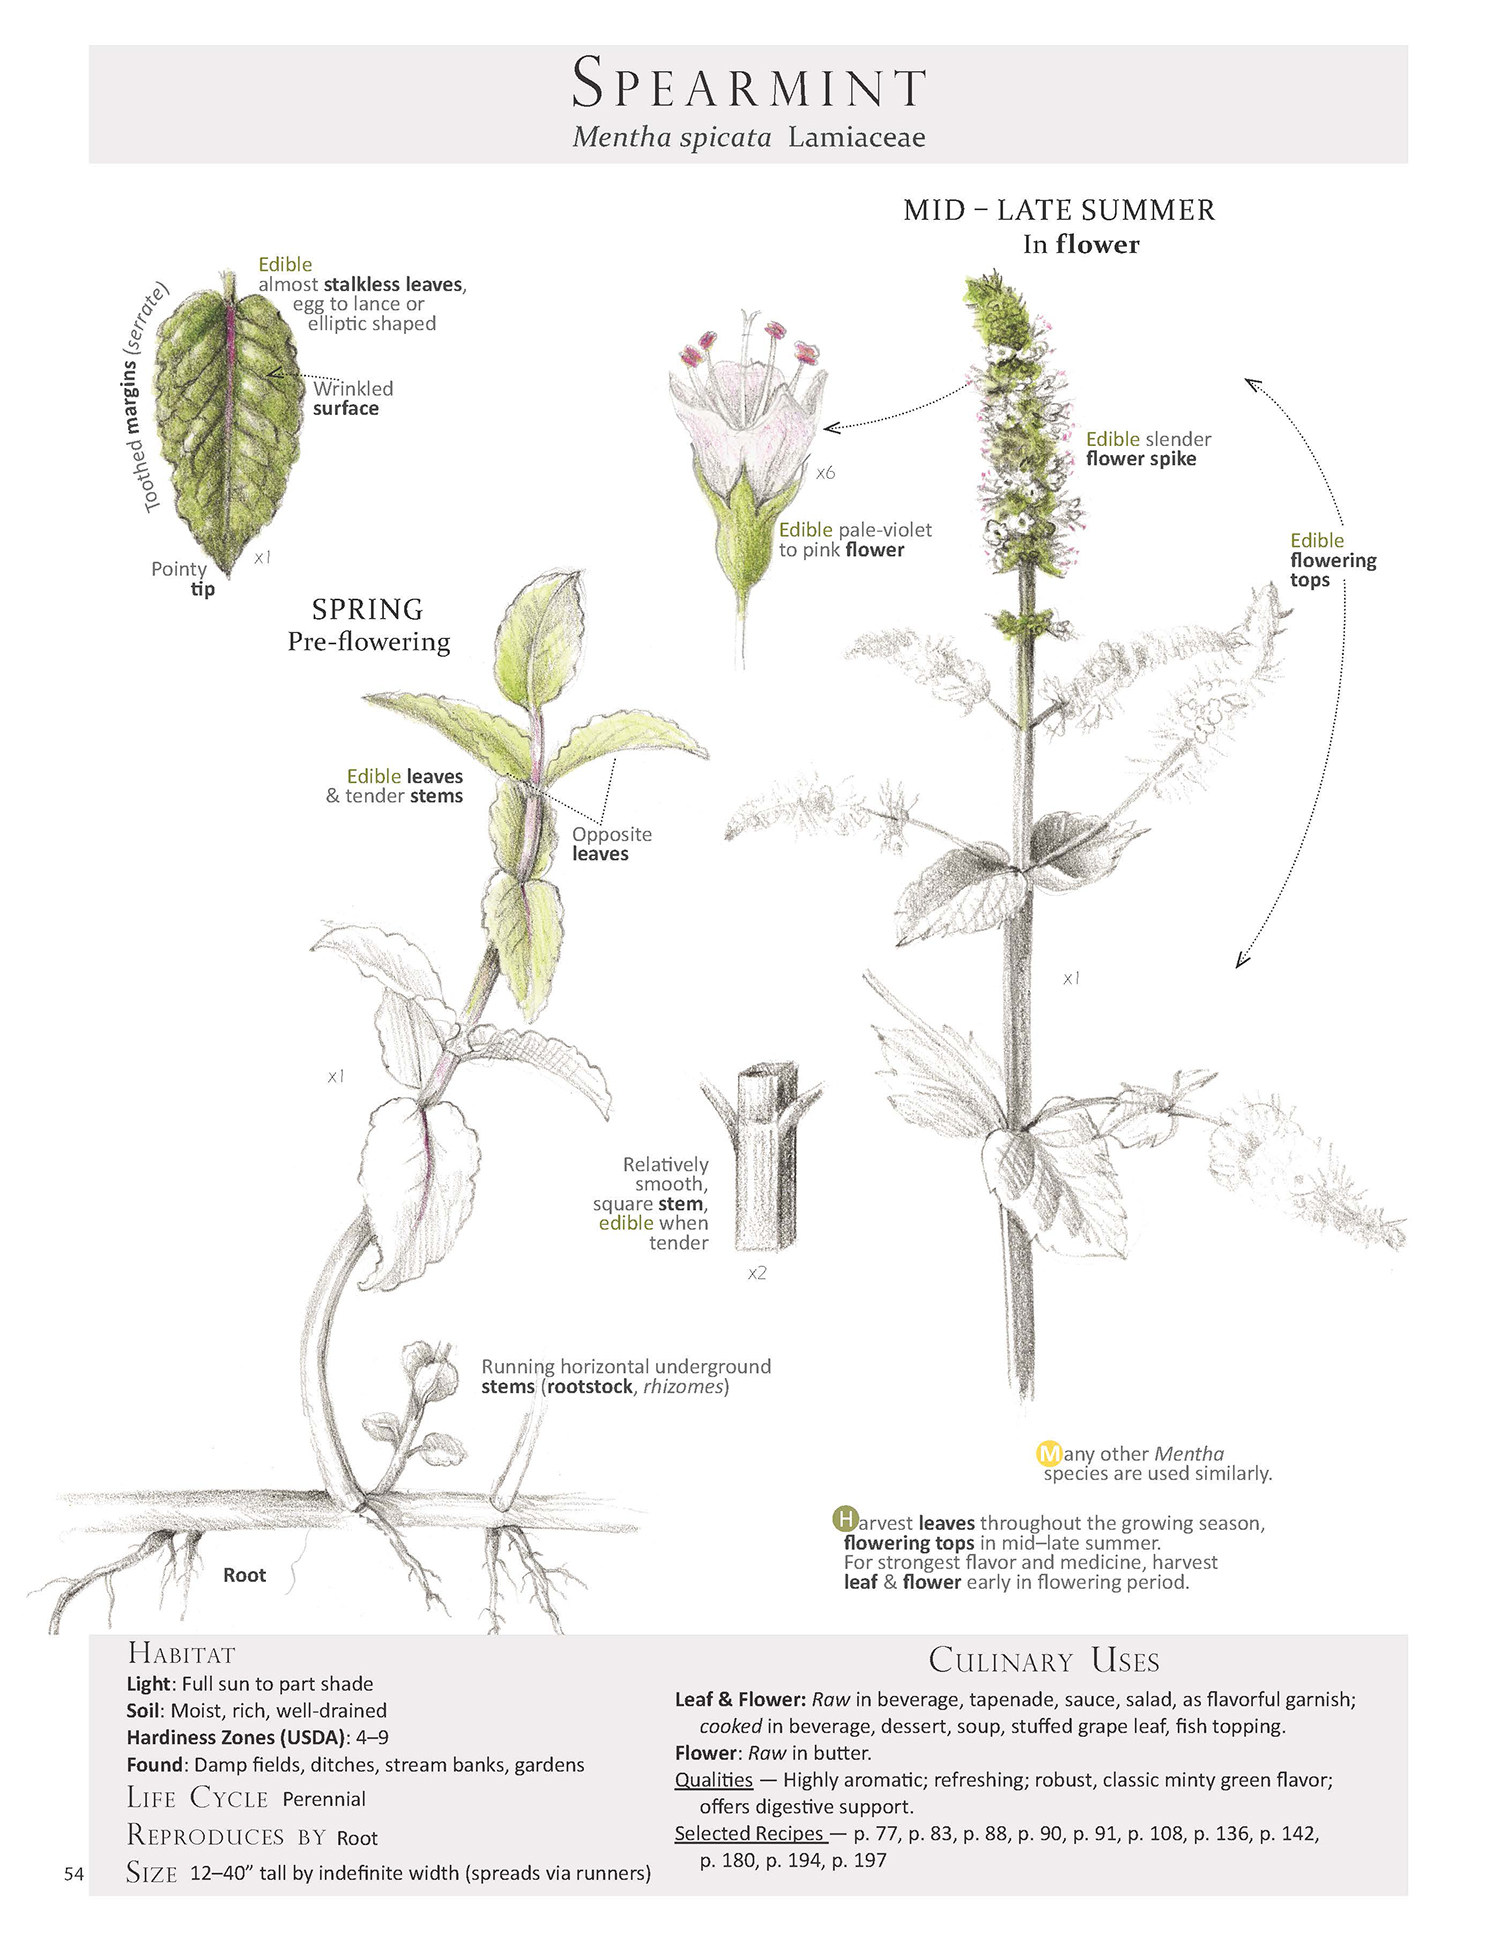
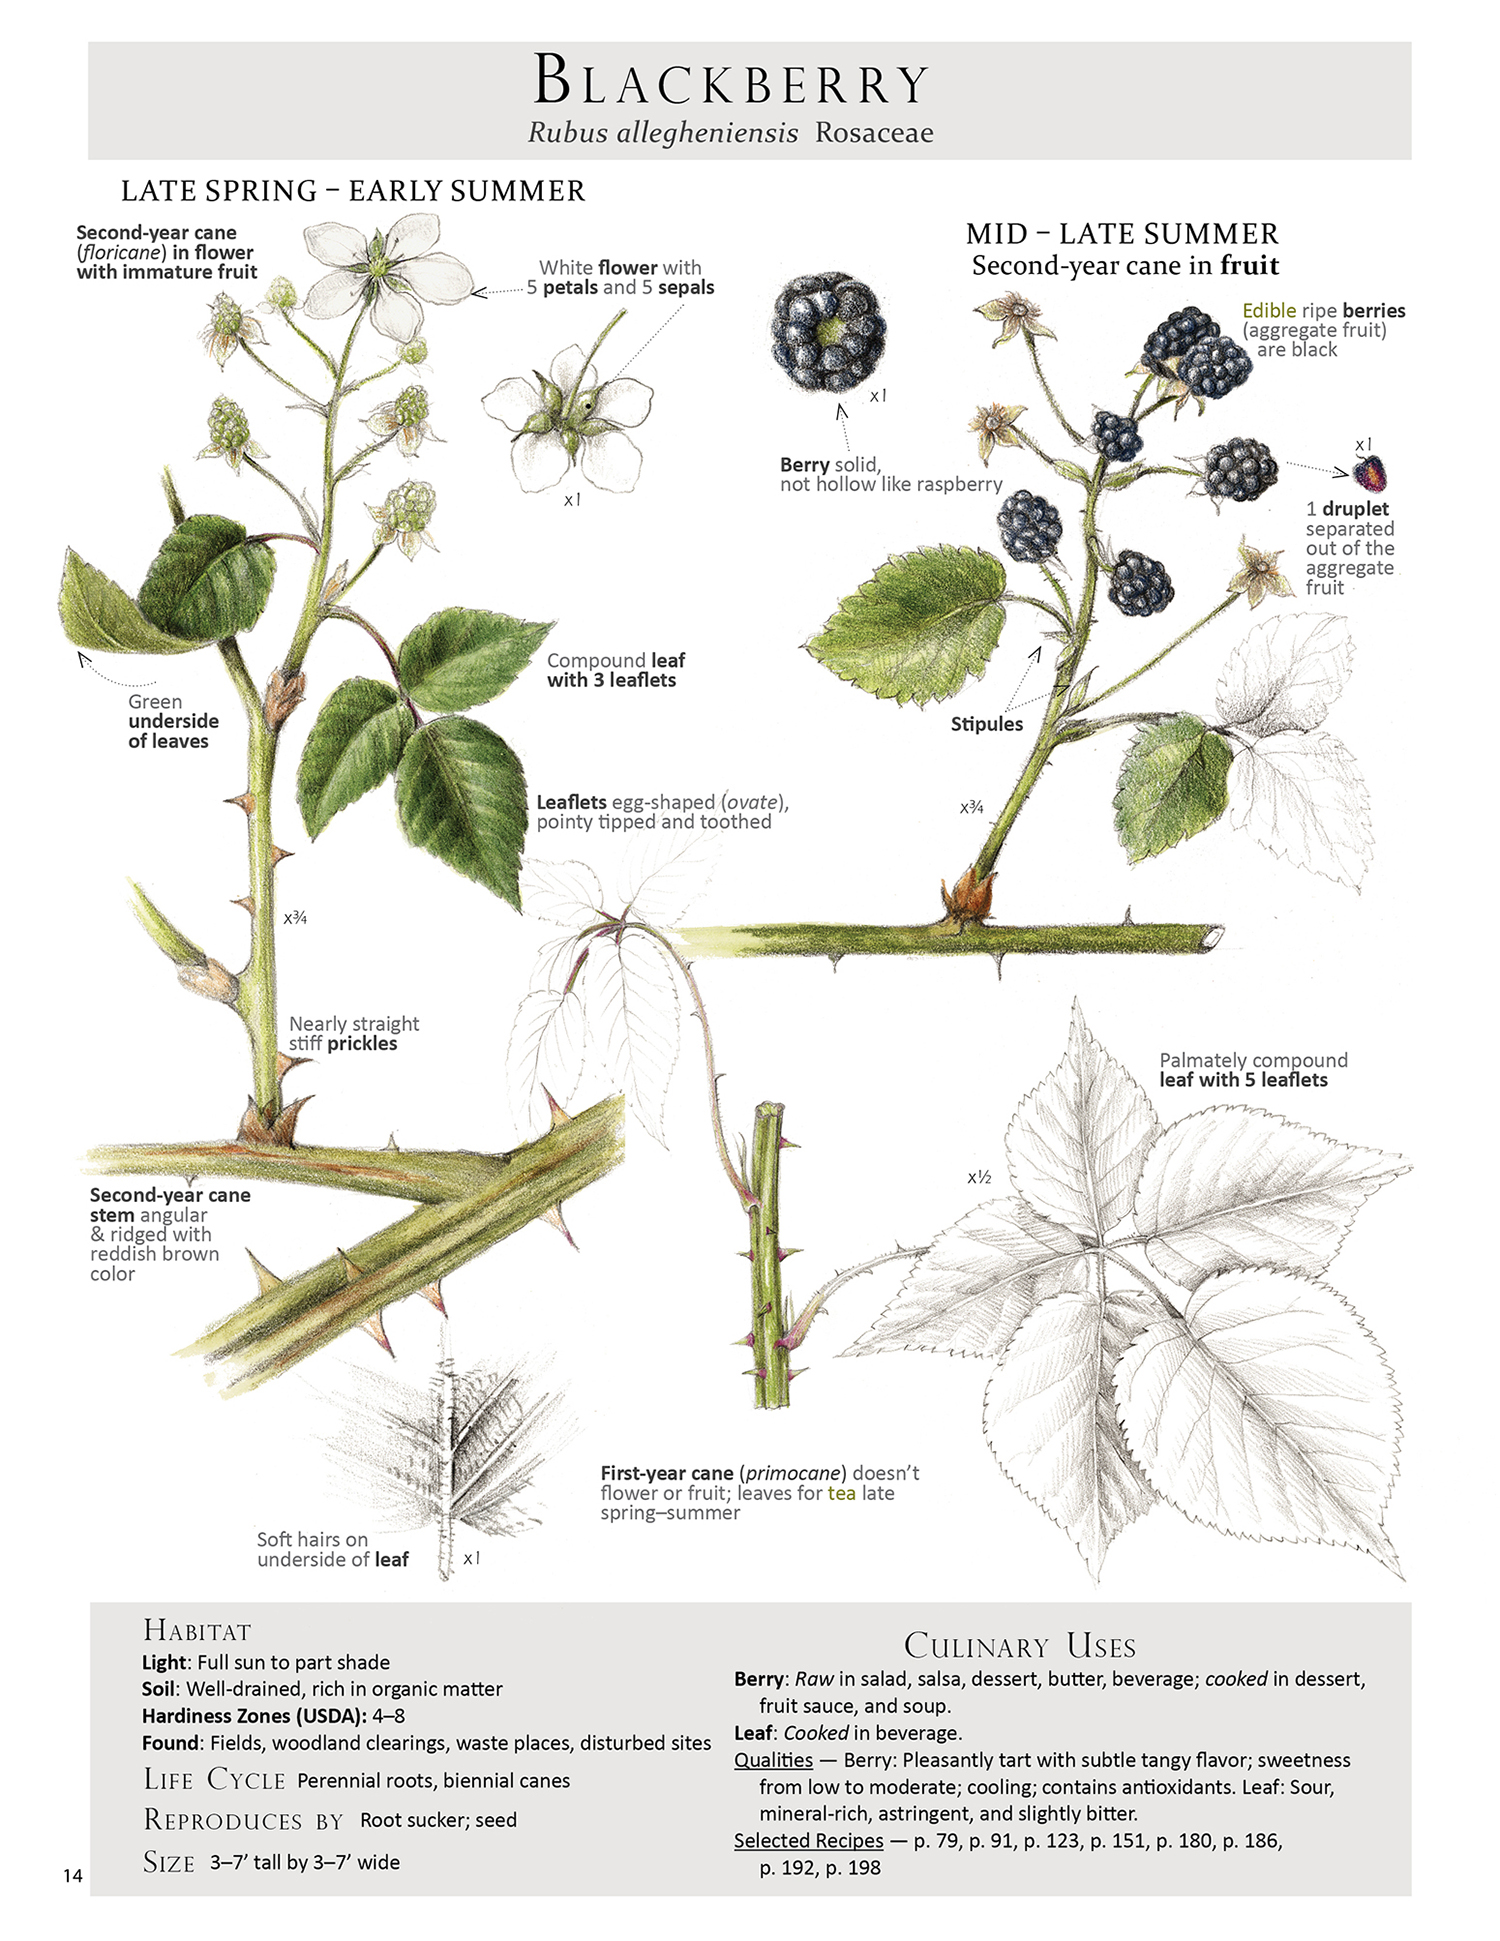
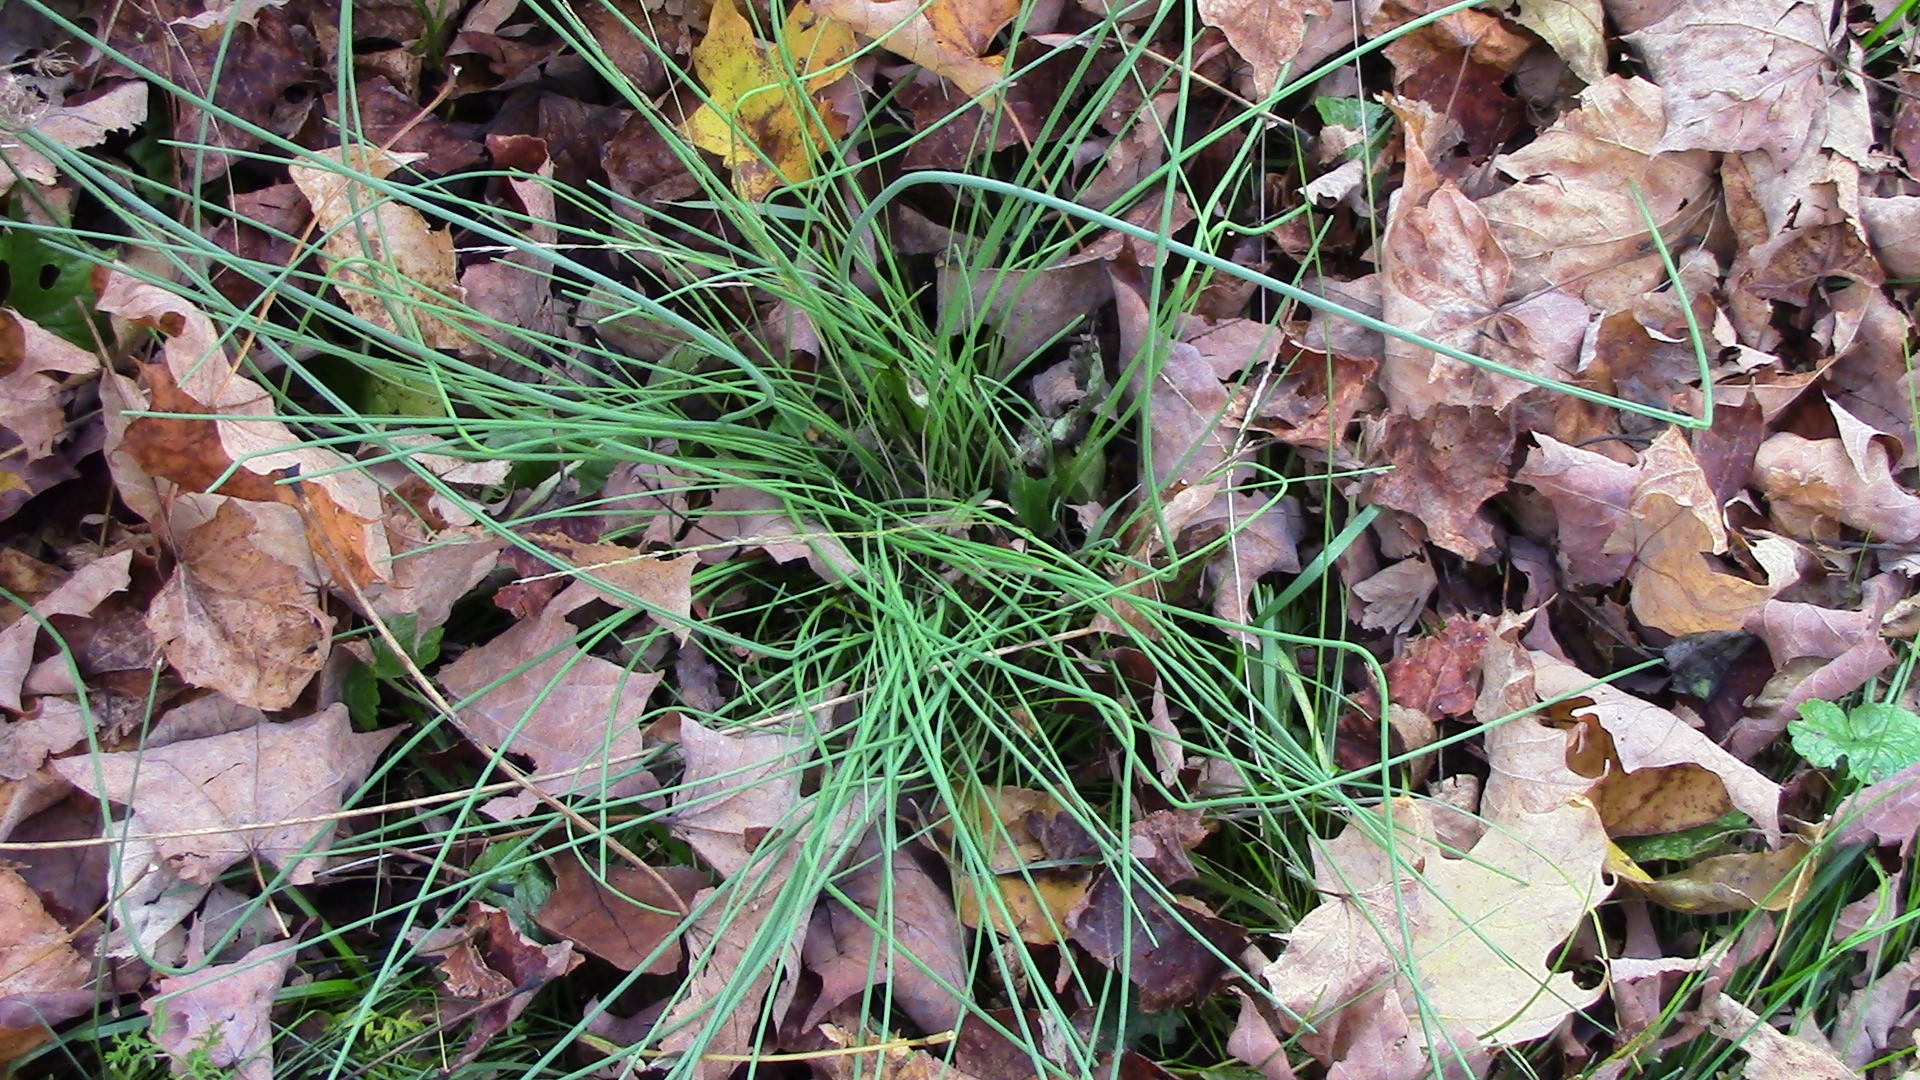
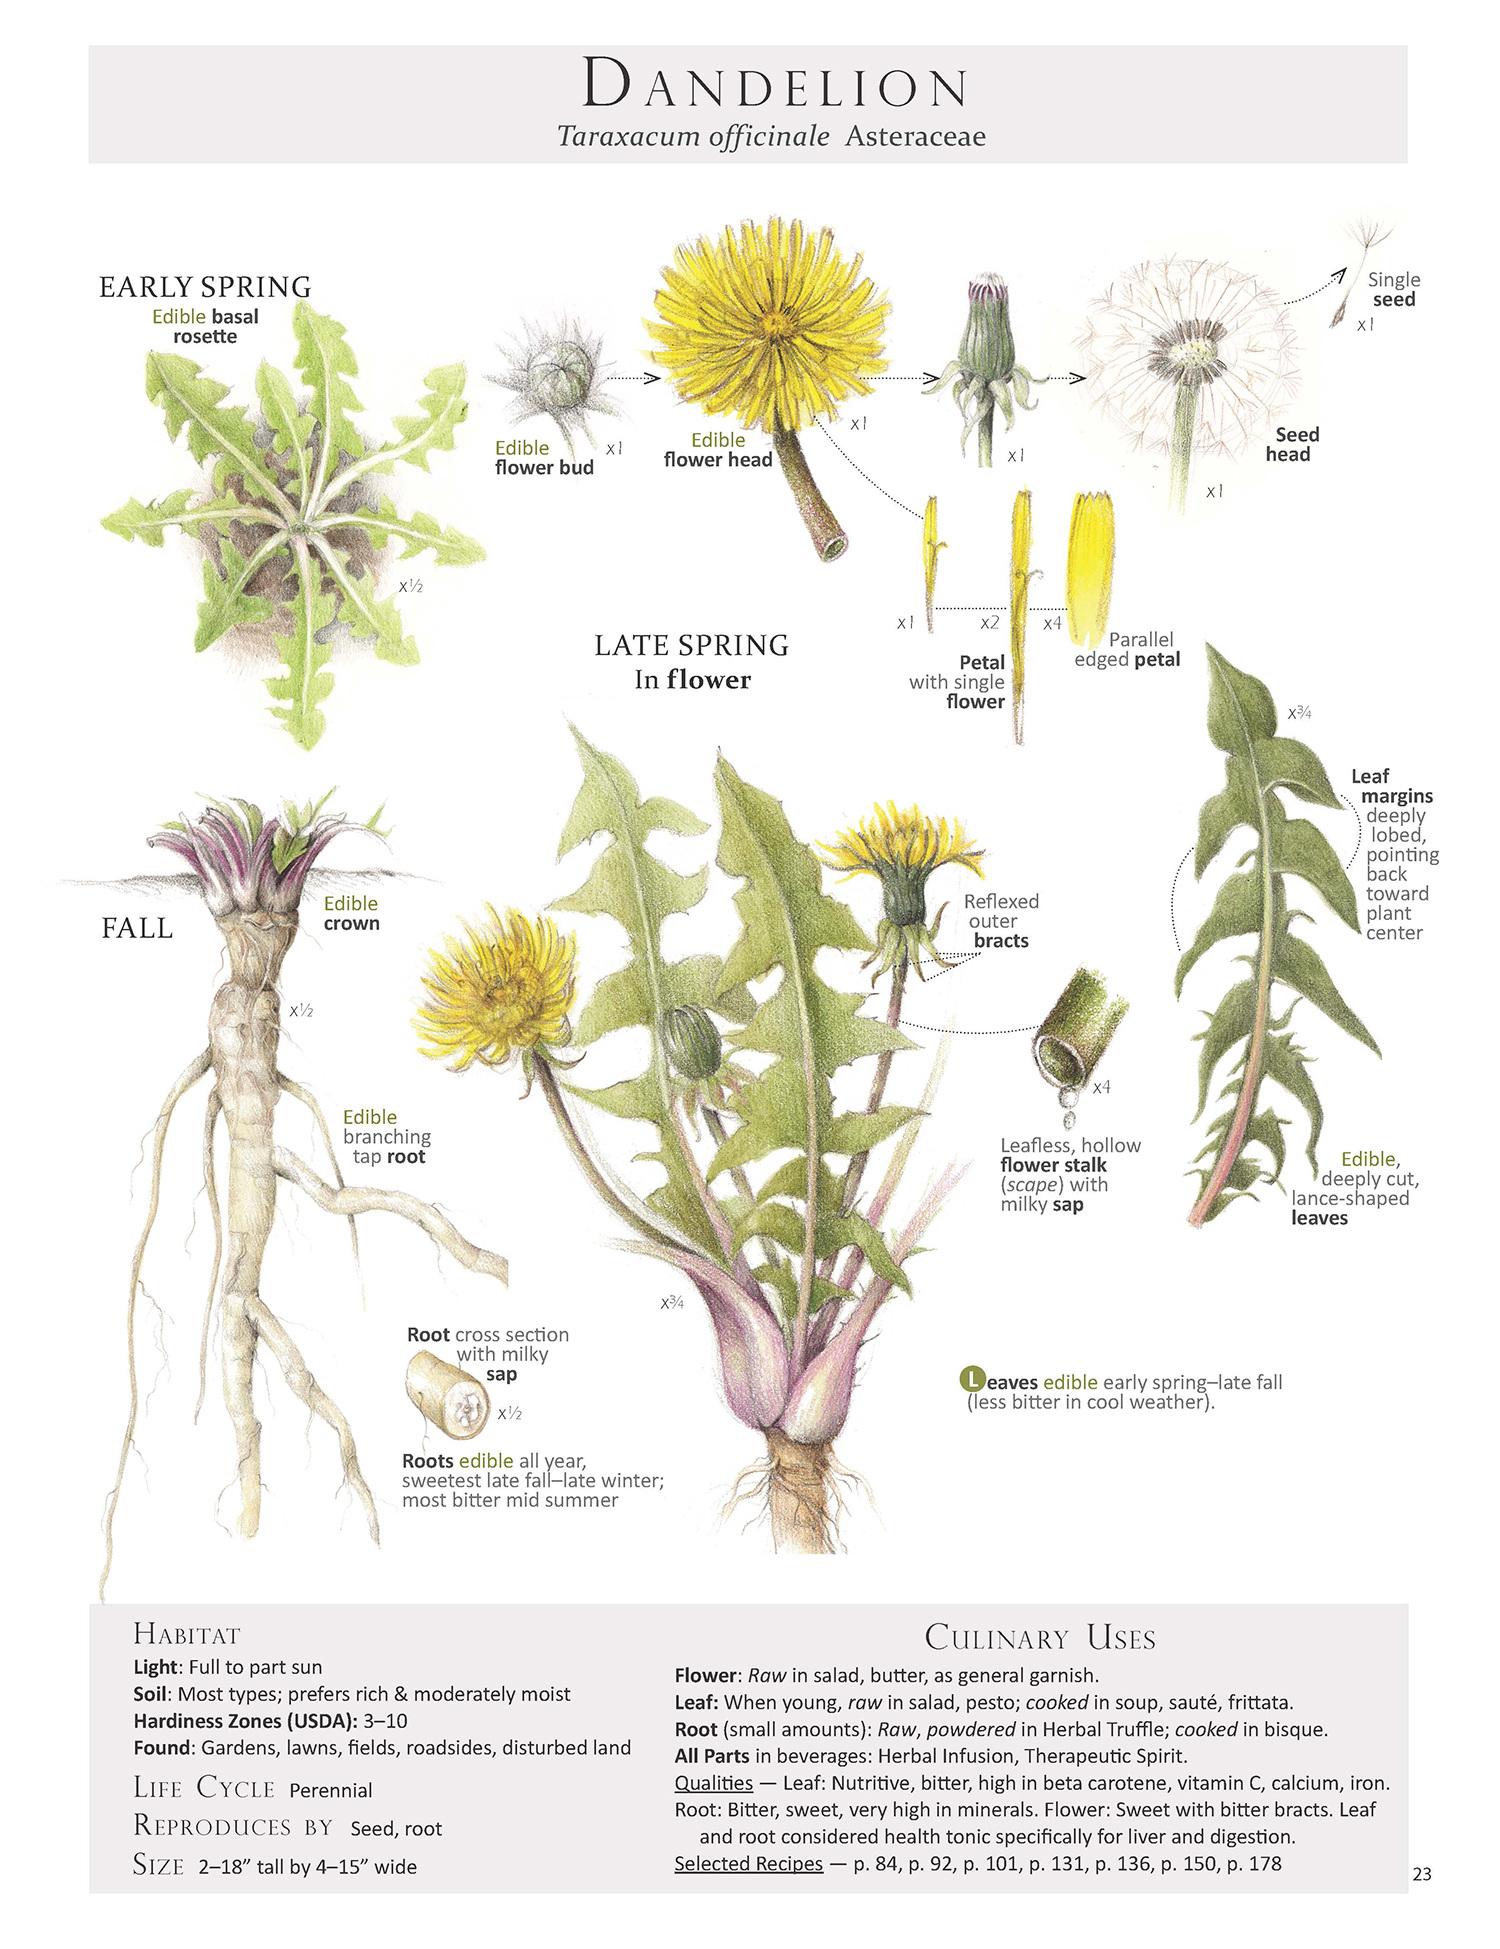
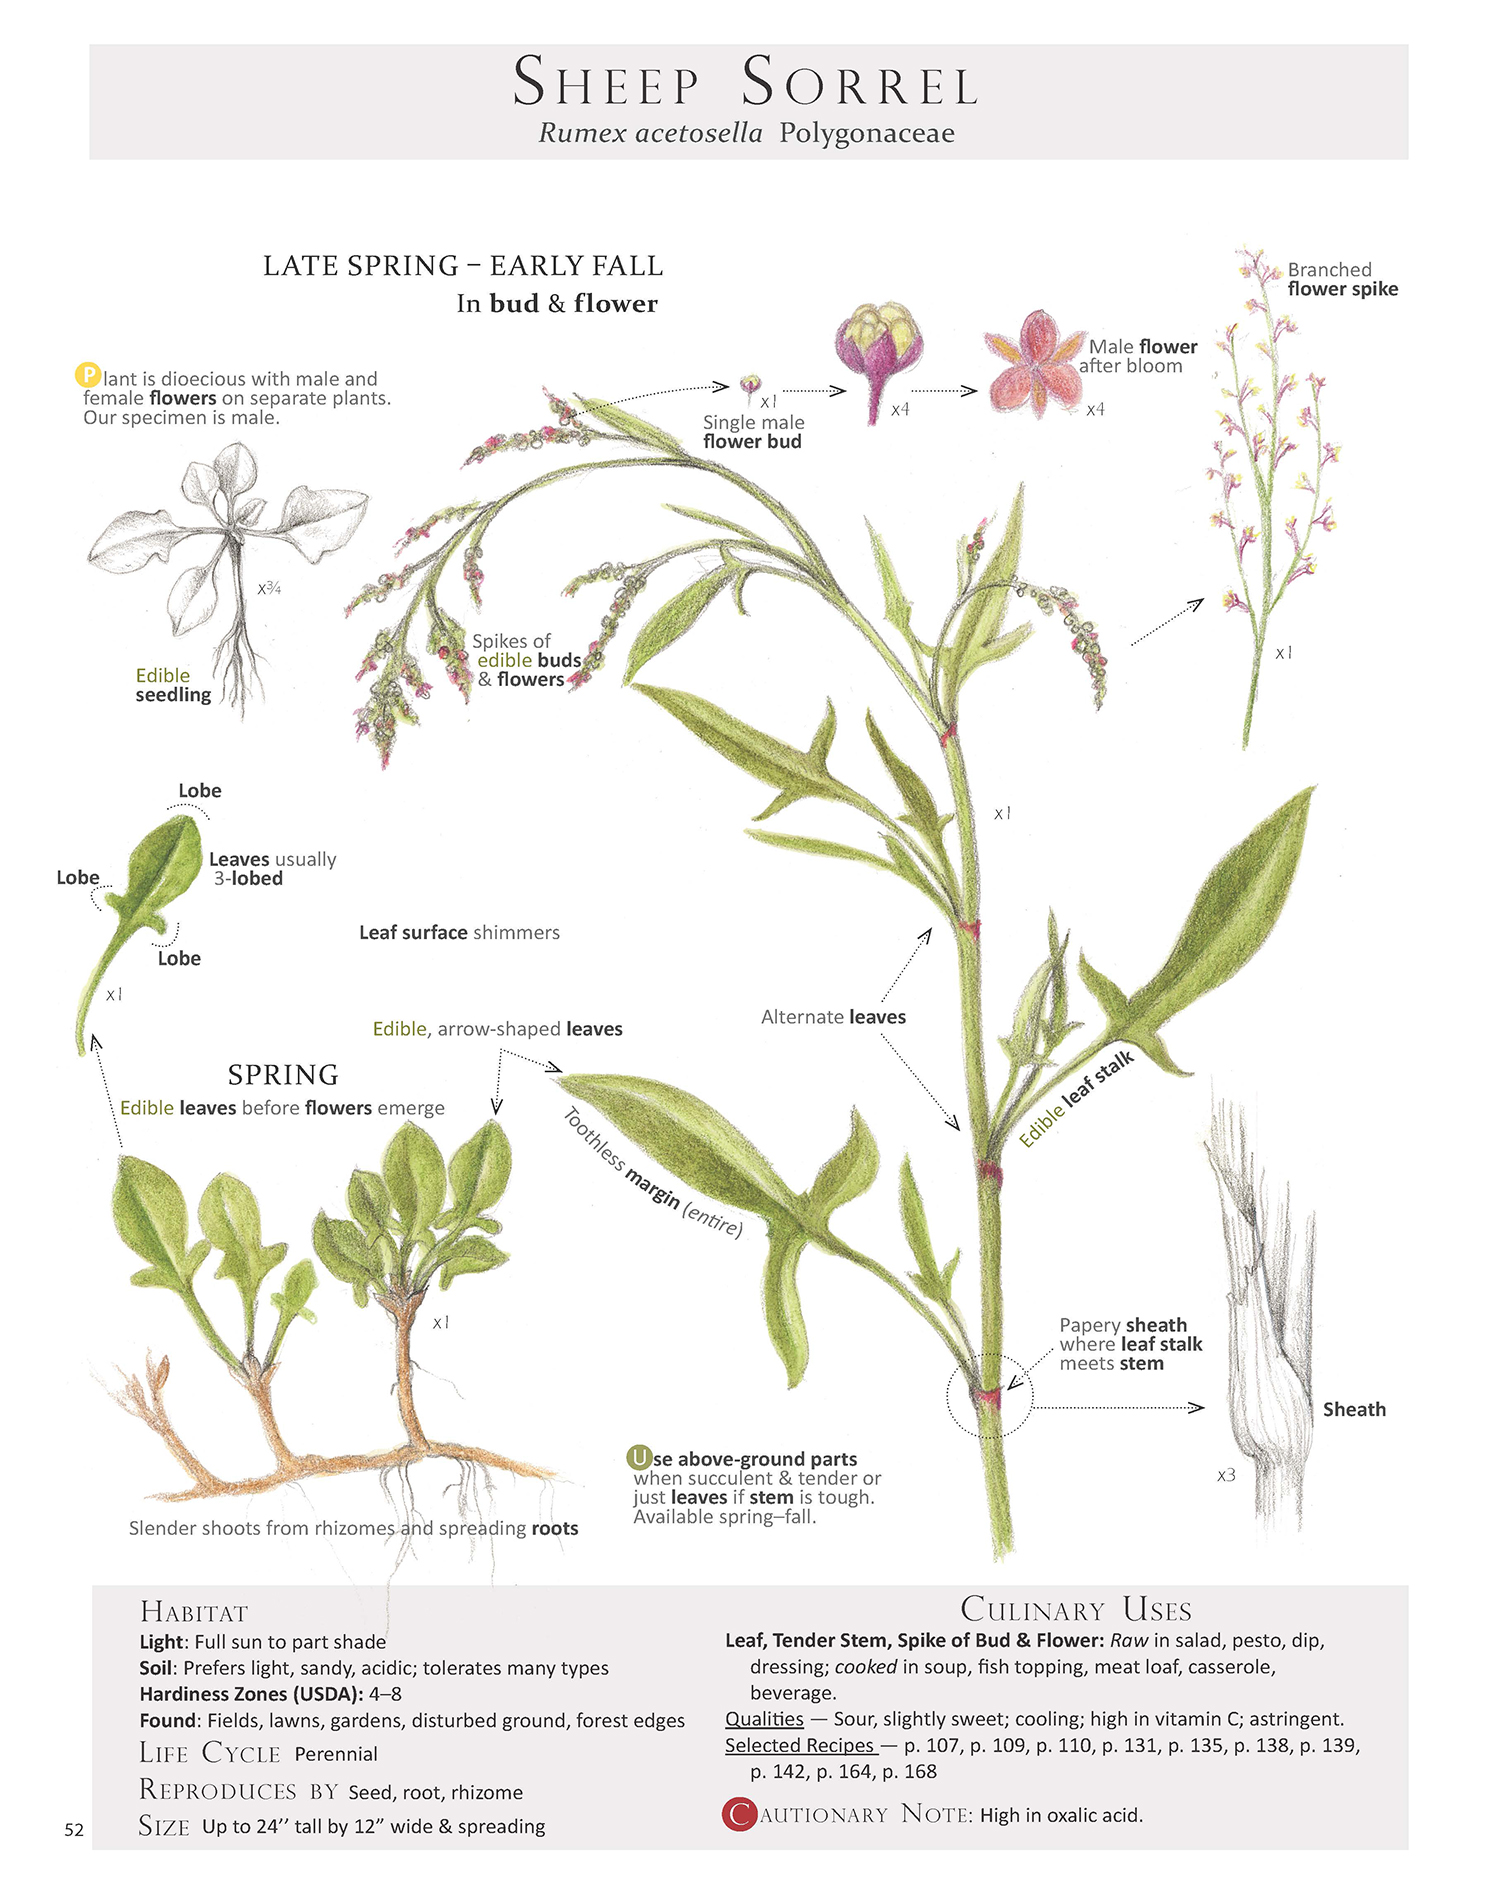
To help with identification and harvest, here is our Spring Nettle Plant Map from our book Foraging & Feasting. Remember to wear gloves when handling nettle to protect yourself from its sting — unless you want to (be clear about this) engage in urtication therapy, considered a topical treatment for congested, stiff muscles and joints.

Spring Nettle Plant Map from our book Foraging & Feasting: A Field Guide and Wild Food Cookbook by Dina Falconi; illustrated by Wendy Hollender
Frittata Master Recipe
Serves 4
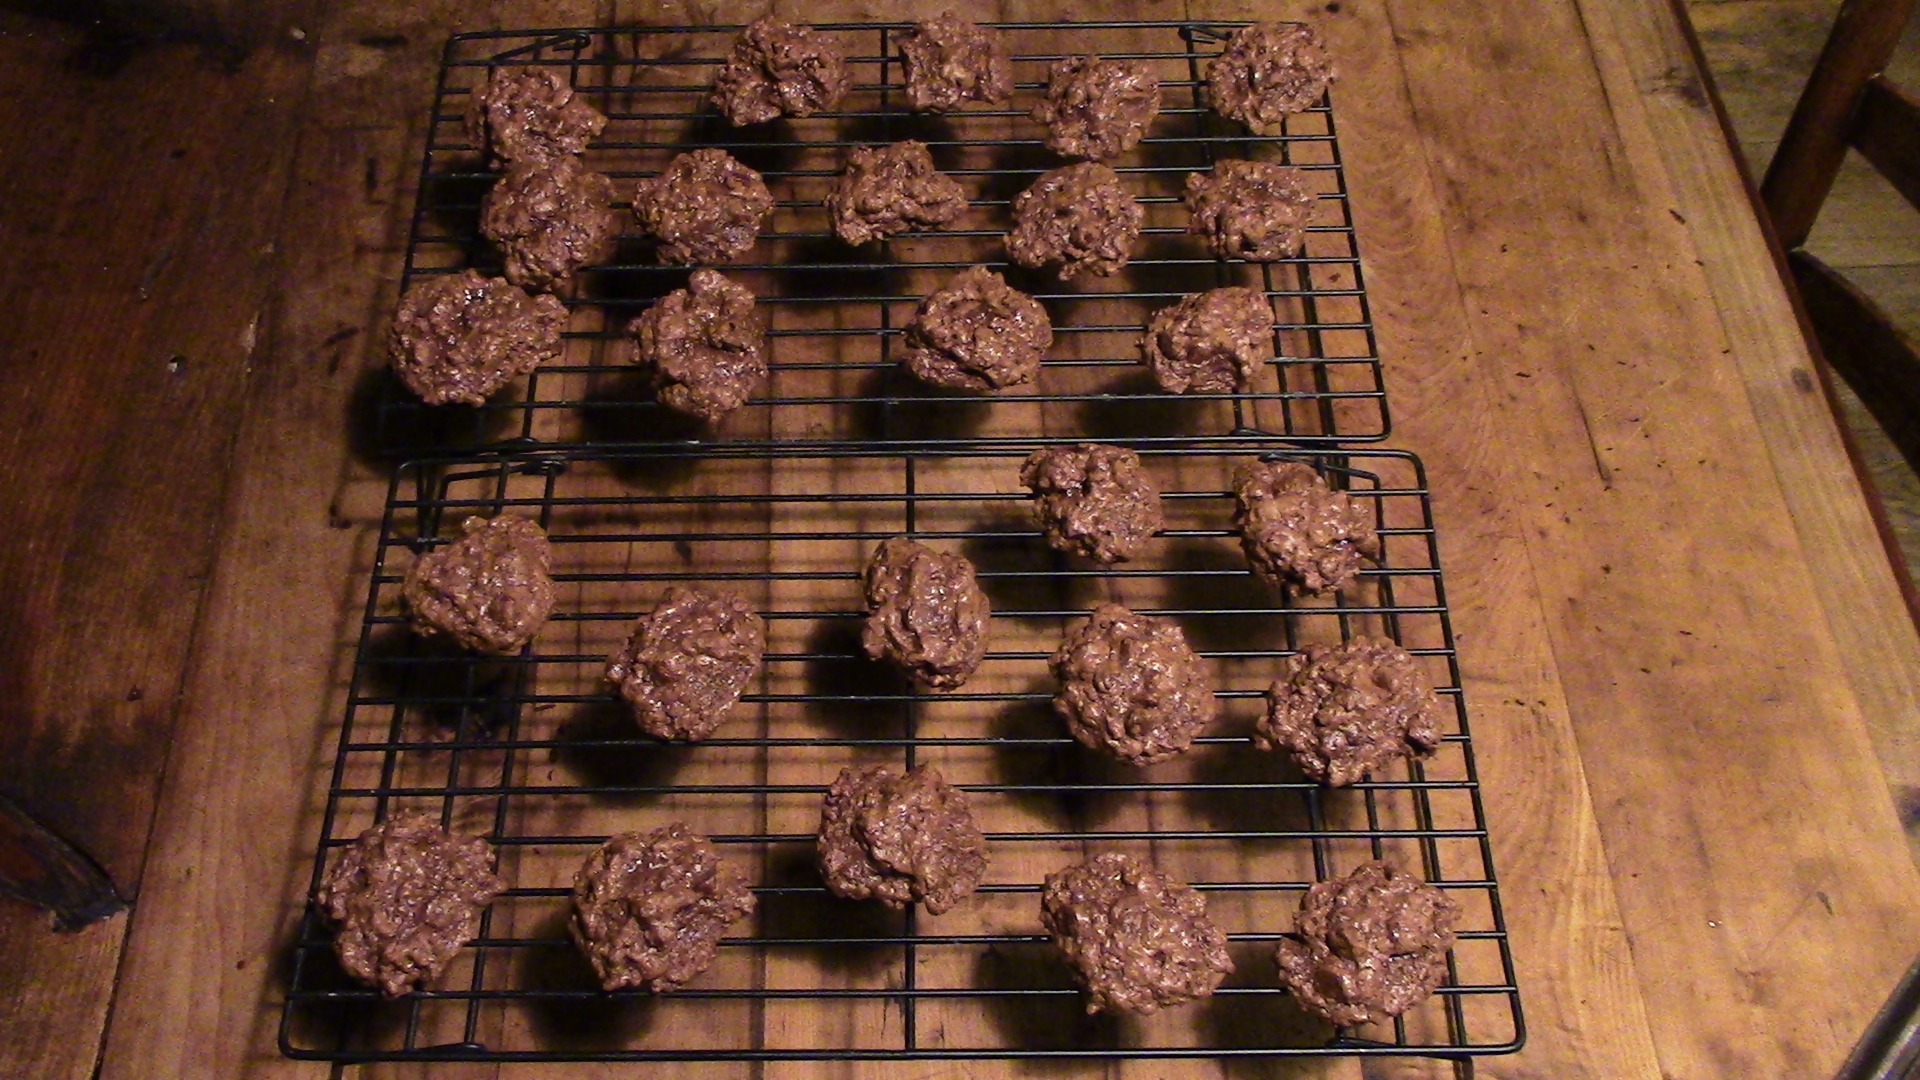
Frittatas offer another great way to feature wild flavors while making a wholesome delicious meal. Serve them for breakfast, lunch, or dinner — or any time of day. A dish somewhere between an omelet and a crustless quiche, frittatas are simple to prepare. This basic recipe allows you to combine various wild greens, aromatic herbs, and cheeses to create satisfying frittatas with the seasonal offerings from fields, gardens, and farmers’’s markets.
- 5 tablespoons fat of choice: butter, olive oil, lard, bacon drippings, etc.
- 1 medium onion, finely chopped
- 3 cups of wild vegetable of choice*, coarsely chopped
- 2 tablespoons strongly flavored aromatic fresh herb, finely chopped, or 2 teaspoons if the herb is dried: wild bergamot, oregano, hardy marjoram, thyme, savory, etc.
- 6 large eggs, preferably organic and pasture raised
- 1/3 cup heavy cream, crème fraichefraîche, or whole milk, preferably organic and grassfed
- 1 cup grated cheese (cheddar or Colby type cheeses weigh about 3½ oz), preferably organic and grassfed
- 3 pinches salt to equal 1/4 teaspoon, or to taste
- 1/8 teaspoon black pepper, or to taste
* Some scrumptious wild choices: leaves and tender stems of nettle, yellow or broad-leaf dock, lamb’s quarter, amaranth, dame’s rocket, purple dead nettle, mallow; day lily shoots; and wild mushrooms.
- In an ovenproof, heavy bottomed, 9 inch pan, such as a cast iron pan, heat 3 tablespoons of fat over medium-low heat.
- Add onion and vegetable and sauté until tender, stirring occasionally; put the lid on the pan if needed to keep the vegetables from drying out.
- Once the vegetables are tender, add the strongly flavored aromatic herbs and 1 pinch of salt, and sauté for 1–2 minutes.
- Meanwhile, in a bowl, mix eggs with cream or milk, 2 pinches of salt, and 1/8 teaspoon black pepper.
- Stir sautéed vegetable mixture into egg mixture.
- Heat the remaining 2 tablespoons of fat in the pan, add the egg-vegetable mixture, and cook over medium-low heat for about five minutes, until the bottom of the frittata is cooked.
- Turn oven on to broil, sprinkle the cheese over the top of the frittata, and place in the oven about 4 inches away from the broiling flame. Broil the frittata until it puffs up and browns, about 5–7 minutes.
- Serve straight from the oven. Cold leftovers are delicious too.
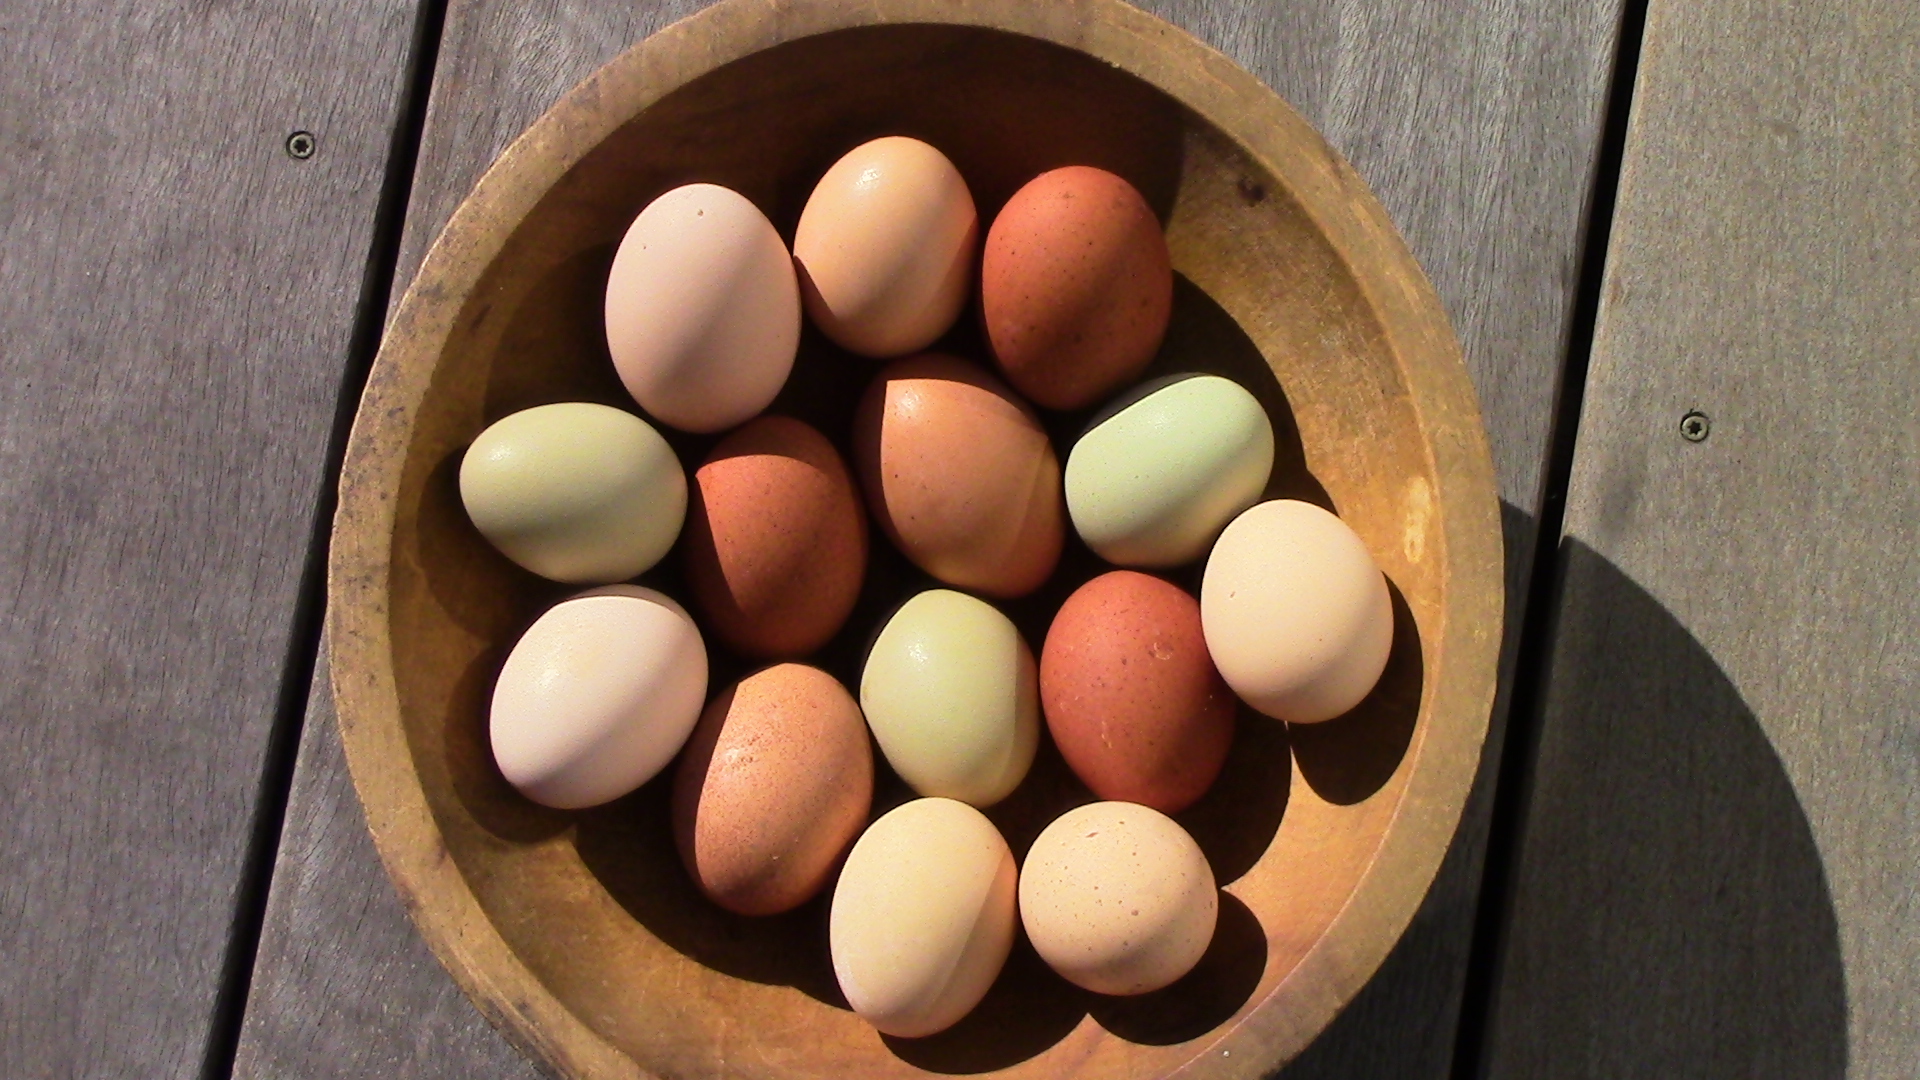
Eggs from the "feral" flock of hens who live in our edible forest chicken yard.
Golden Eggs From Pastured Hens: While all eggs provide a good source of complete protein, all eggs are not equal. Taking the effort to buy the best eggs available — ideally from pastured hens given free range to eat grass, weeds and bugs outside in the sunshine, and fed naturally grown, non-genetically modified grain — is well worth the effort. These eggs are truly nutritious, full of vitamins A, D, E, and K2, and contain a balanced fatty acid profile (omegas in the right ratios). So getting to know who has the best eggs in the neighborhood is worthwhile knowledge indeed.