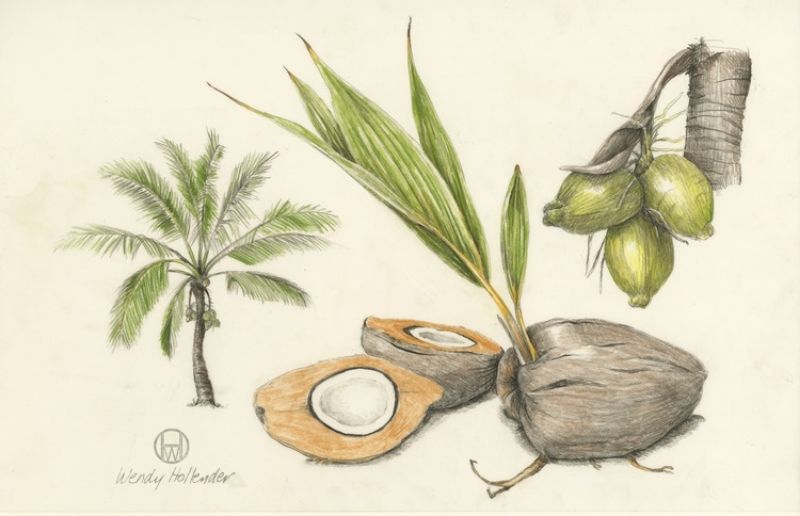
Coconut & chocolate ganache master recipe from Foraging & Feasting.
Read moreCoconut & Chocolate Ganache
Your Custom Text Here
Coconut & chocolate ganache master recipe from Foraging & Feasting.
Read moreThere's an exciting bounty to be had in turning wild grape leaves into delicious, nutritious food. Typically used for wrapping around savory rice fillings, with or without ground meat, grape leaves can also be wrapped around other foods such as fish, meatloaf, and more. In our area we are lucky to have an abundance of wild grape vines that appreciate pruning, and in return they reward us with a substantial supply of leaves. Cultivated grapes grown without chemicals provide another great source for leaves; perhaps a grape grower in your area will kindly share some leaves from mid spring through early summer pruning (usually they throw these away). Cook them up fresh and preserve some by marinating, dry canning, freezing, or lacto-fermenting so you can enjoy them throughout the year. You'll find detailed instructions below.
Grape leaves fall into the category of “wrap cookery,” along with cabbage, lettuce, spinach, and other wild leaves. Essentially any leaf that is tasty and tender yet strong enough to wrap around food falls into this category.
Harvesting Tips for Grape Leaves
Wild Grape Leaf page from our book Foraging & Feasting: A Field Guide and Wild Food Cookbook by Dina Falconi; illustrated by Wendy Hollender
How to Stuff Grape Leaves
1. Spread grape leaf flat on a plate, unfolding any wrinkles. Face shiny side (the upper side of the leaf) down, with the stem remnant (leaf base) closest to you, and leaf tip pointing away from you. When using frozen or dry canned leaves, sprinkle them with a little water if they seem dry and brittle.
2. Place stuffing onto the lower center of the leaf, about an inch away from the leaf base.
· If using a raw grain stuffing, use a heaping teaspoon per leaf.
· If using a raw grain and meat stuffing, use a heaping teaspoon per leaf.
· If using a raw meat stuffing, use a heaping tablespoon per leaf.
· If using a cooked stuffing, use a heaping tablespoon per leaf.
3. Fold the leaf base (the edge closest to you) up over the stuffing and then fold the leaf sides toward the center, encasing the stuffing. Continue to roll toward the leaf tip, tucking the leaf sides into the center as you turn, rolling until the leaf tip is incorporated into the final cylindrical shape.
4. Stuffed grape leaves made with marinated leaves and a precooked filling may be eaten right away; ones made with raw filling and leaves need to be cooked and should be placed seam-side down in the cooking vessel to prevent them from unraveling.
Spread out on the plate is a marinated leaf I picked and preserved in spring. It awaits a precooked filling. Below is the jar the leaf was pulled out of. I placed a 100 or so grape leaves in this wide-mouth pint mason jar and covered them with a marinade made of olive oil, vinegar, and sea salt. FYI, leaves were first blanched before marinating. The jar, tightly covered, was kept in my refrigerator. I can't say for how long since I forgot to label the jar. Was it last spring or two springs ago? Note to self: label all concoctions. In any case the leaves are still in excellent condition and ready to be filled.
To stuff marinated grape leaves, choose a precooked stuffing such as the Grain Salads (p. 136), Grain Pilaf Variations (p. 138), or Bean Salads (p. 139). Naturally, part of the fun is to experiment and invent fillings to suit your fancy. Fill each grape leaf with a heaping tablespoon of stuffing and, if needed, refer to How to Stuff Grape Leaves above. Note: 3 cups of cooked stuffing fills about 32 grape leaves. The stuffing I made yesterday (pictured in the photo below) is a winter variation made with brown rice (soaked and cooked), parsley, almonds (soaked, dried, and lightly roasted), raisins, scallions, dried peppermint, olive oil, vinegar, sea salt and pepper.
Grape leaf with a heaping tablespoon of filling placed onto the lower center of the leaf, about an inch away from the leaf base, ready to be rolled.
All rolled up!
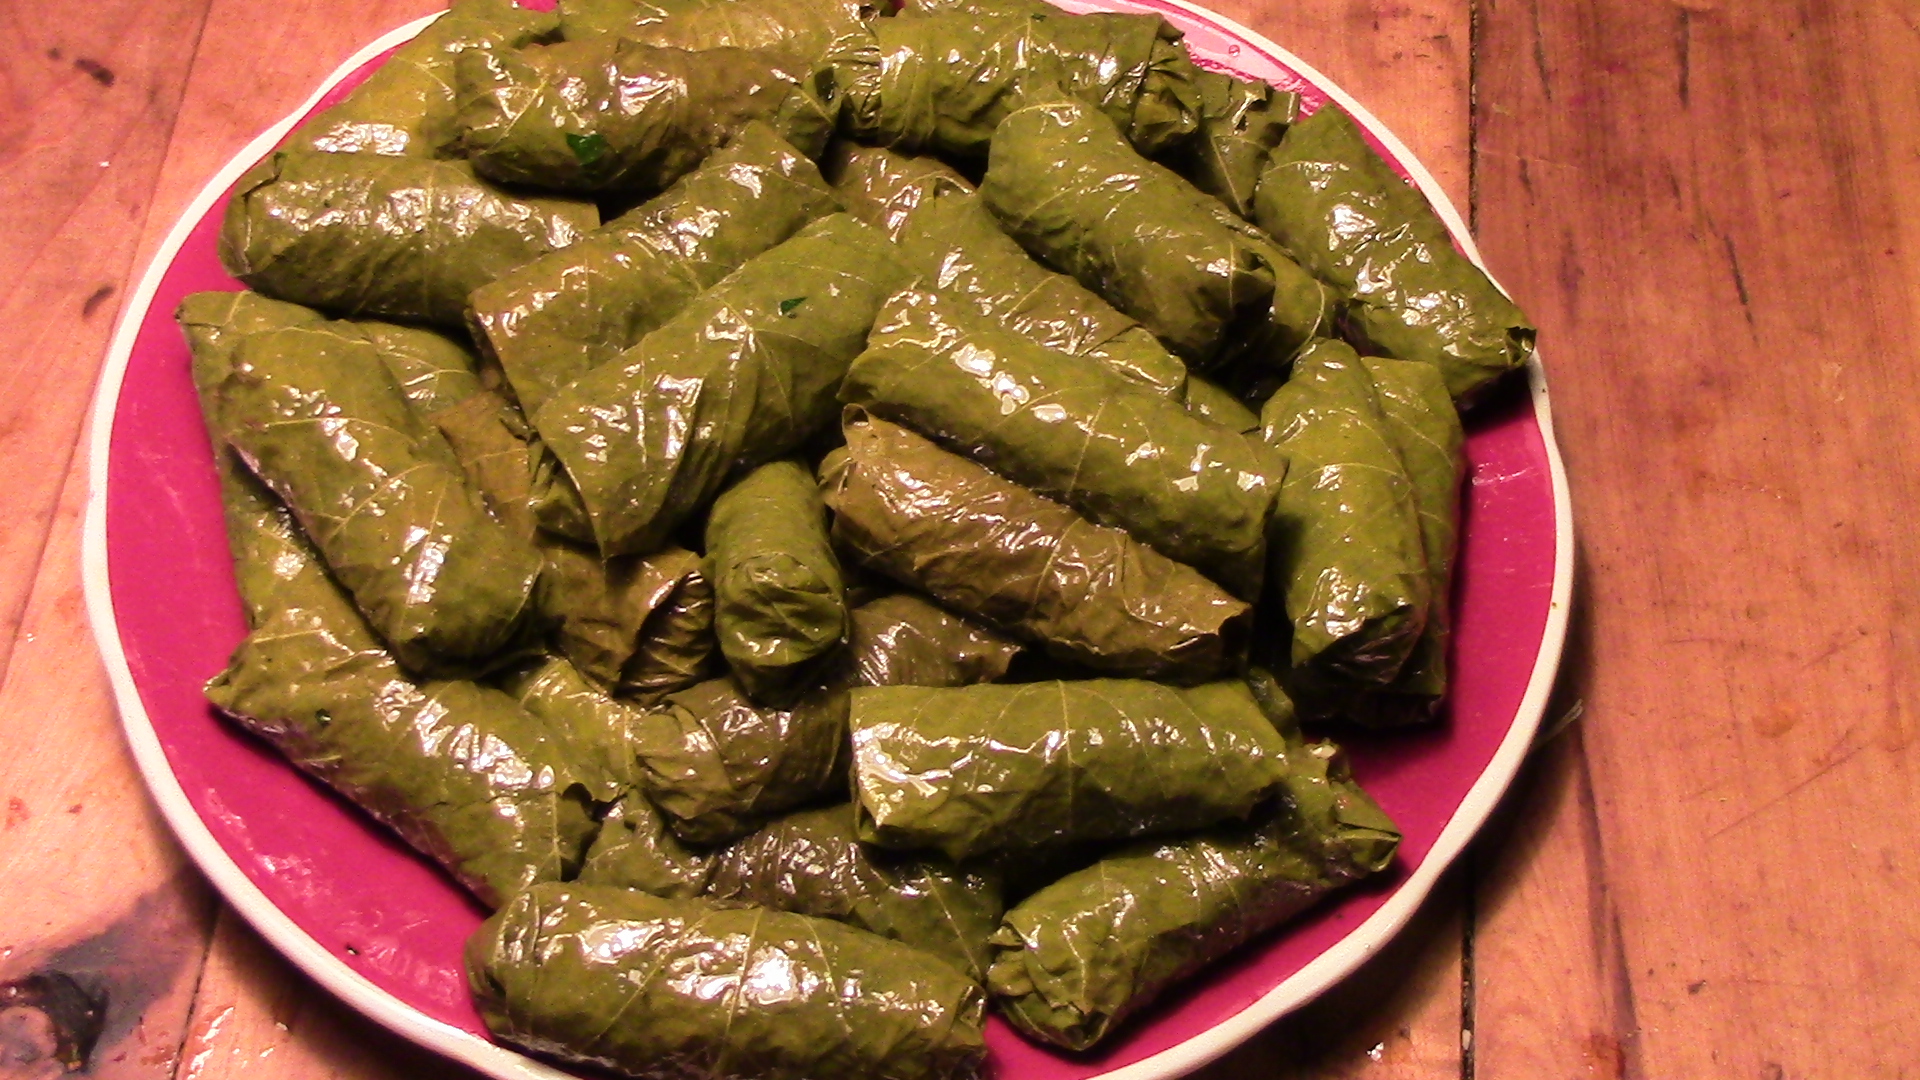
A plate full of stuffed grape leaves ready for the Valentine's day party. More will be served today at the neighborhood seed-sharing gathering.
After resting during the hottest, driest months of the year, field garlic (aka Allium vineale) returns with full vigor. Closely related to chives and scallions, this perennial of the Amaryllidaceae family can be used similarly, offering a strong, pungent, spicy, aromatic onion flavor. Originally from Europe, it now grows prolifically in many parts of the world, especially here in the Northeastern US. Often referred to as onion grass: it looks like grass; flourishes in lawns; and tastes oniony. Also look for field garlic in fields, gardens, and open woods.
Why not include field garlic in your food for a little free, wild flavor! Mince it up and add it to salad, soup, frittata, scones, wild green pesto, baked fish and so much more. BTW, it's probably growing right outside your doorstep. For clues on how to identify it properly, please refer to the image here from my book Foraging & Feasting: A Field Guide and Wild Food Cookbook.
From the book Foraging & Feasting: A Field Guide and Wild Food Cookbook by Dina Falconi, illustrated by Wendy Hollender
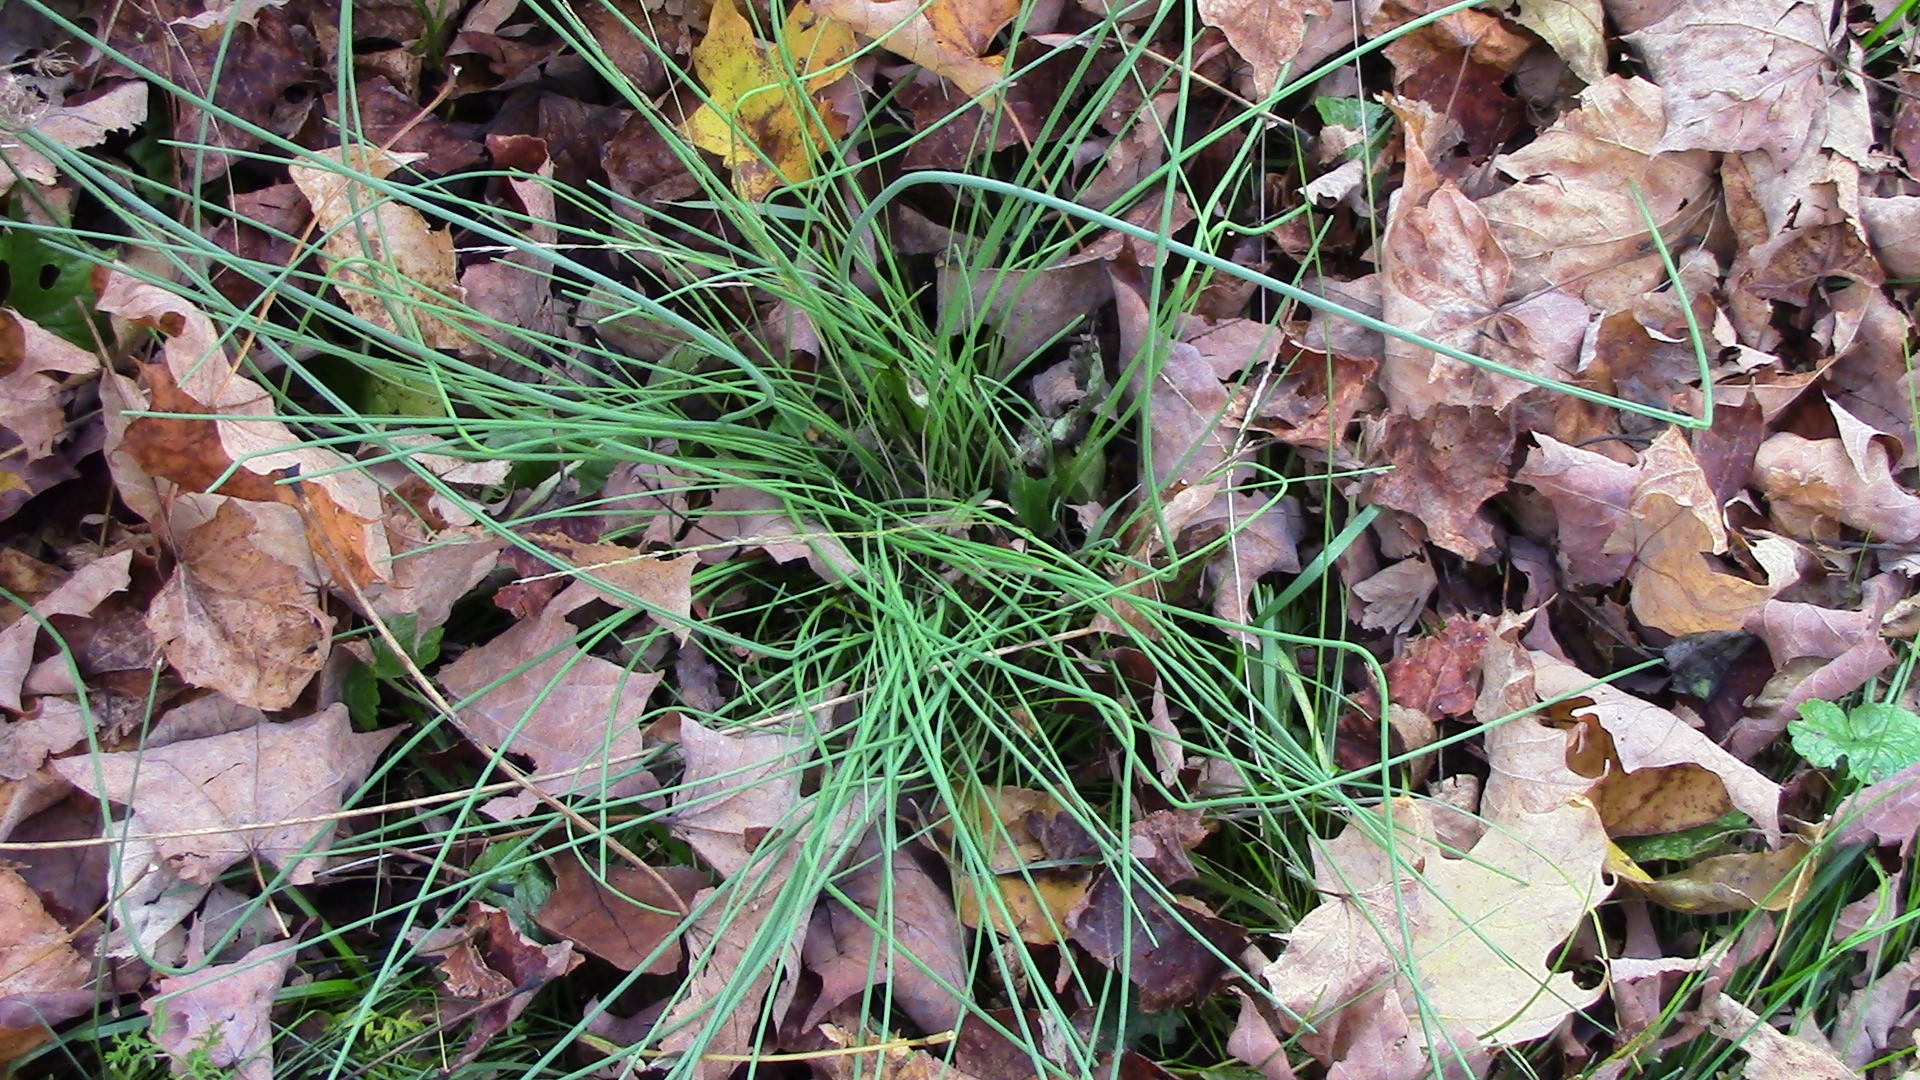
Field garlic photo taken today.
This photo of field garlic shows how much it looks like a clump of grass. Not so helpful in distinguishing it from other plant species. The strongest clue is it's aroma = onion! Again, please refer to the clues on our plant page above for help with accurate identification.
Wondering what to do with all those aromatic culinary herbs — wild or cultivated? Here's an ancient salting technique — a simple way to capture and preserve wild plants as they pass through the landscape. By mixing strongly flavored plants with each other, and also with milder ones, we can create intriguing taste combinations. Add a tablespoon or two of this savory condiment — think of it as a bouillon substitute — to flavor sauces, stews, soups, beans, and more. This recipe is an excerpt from the Relishes, Spreads, and Condiments chapter from my book Foraging & Feasting.
From the book Foraging & Feasting by Dina Falconi; illustrated by Wendy Hollender.
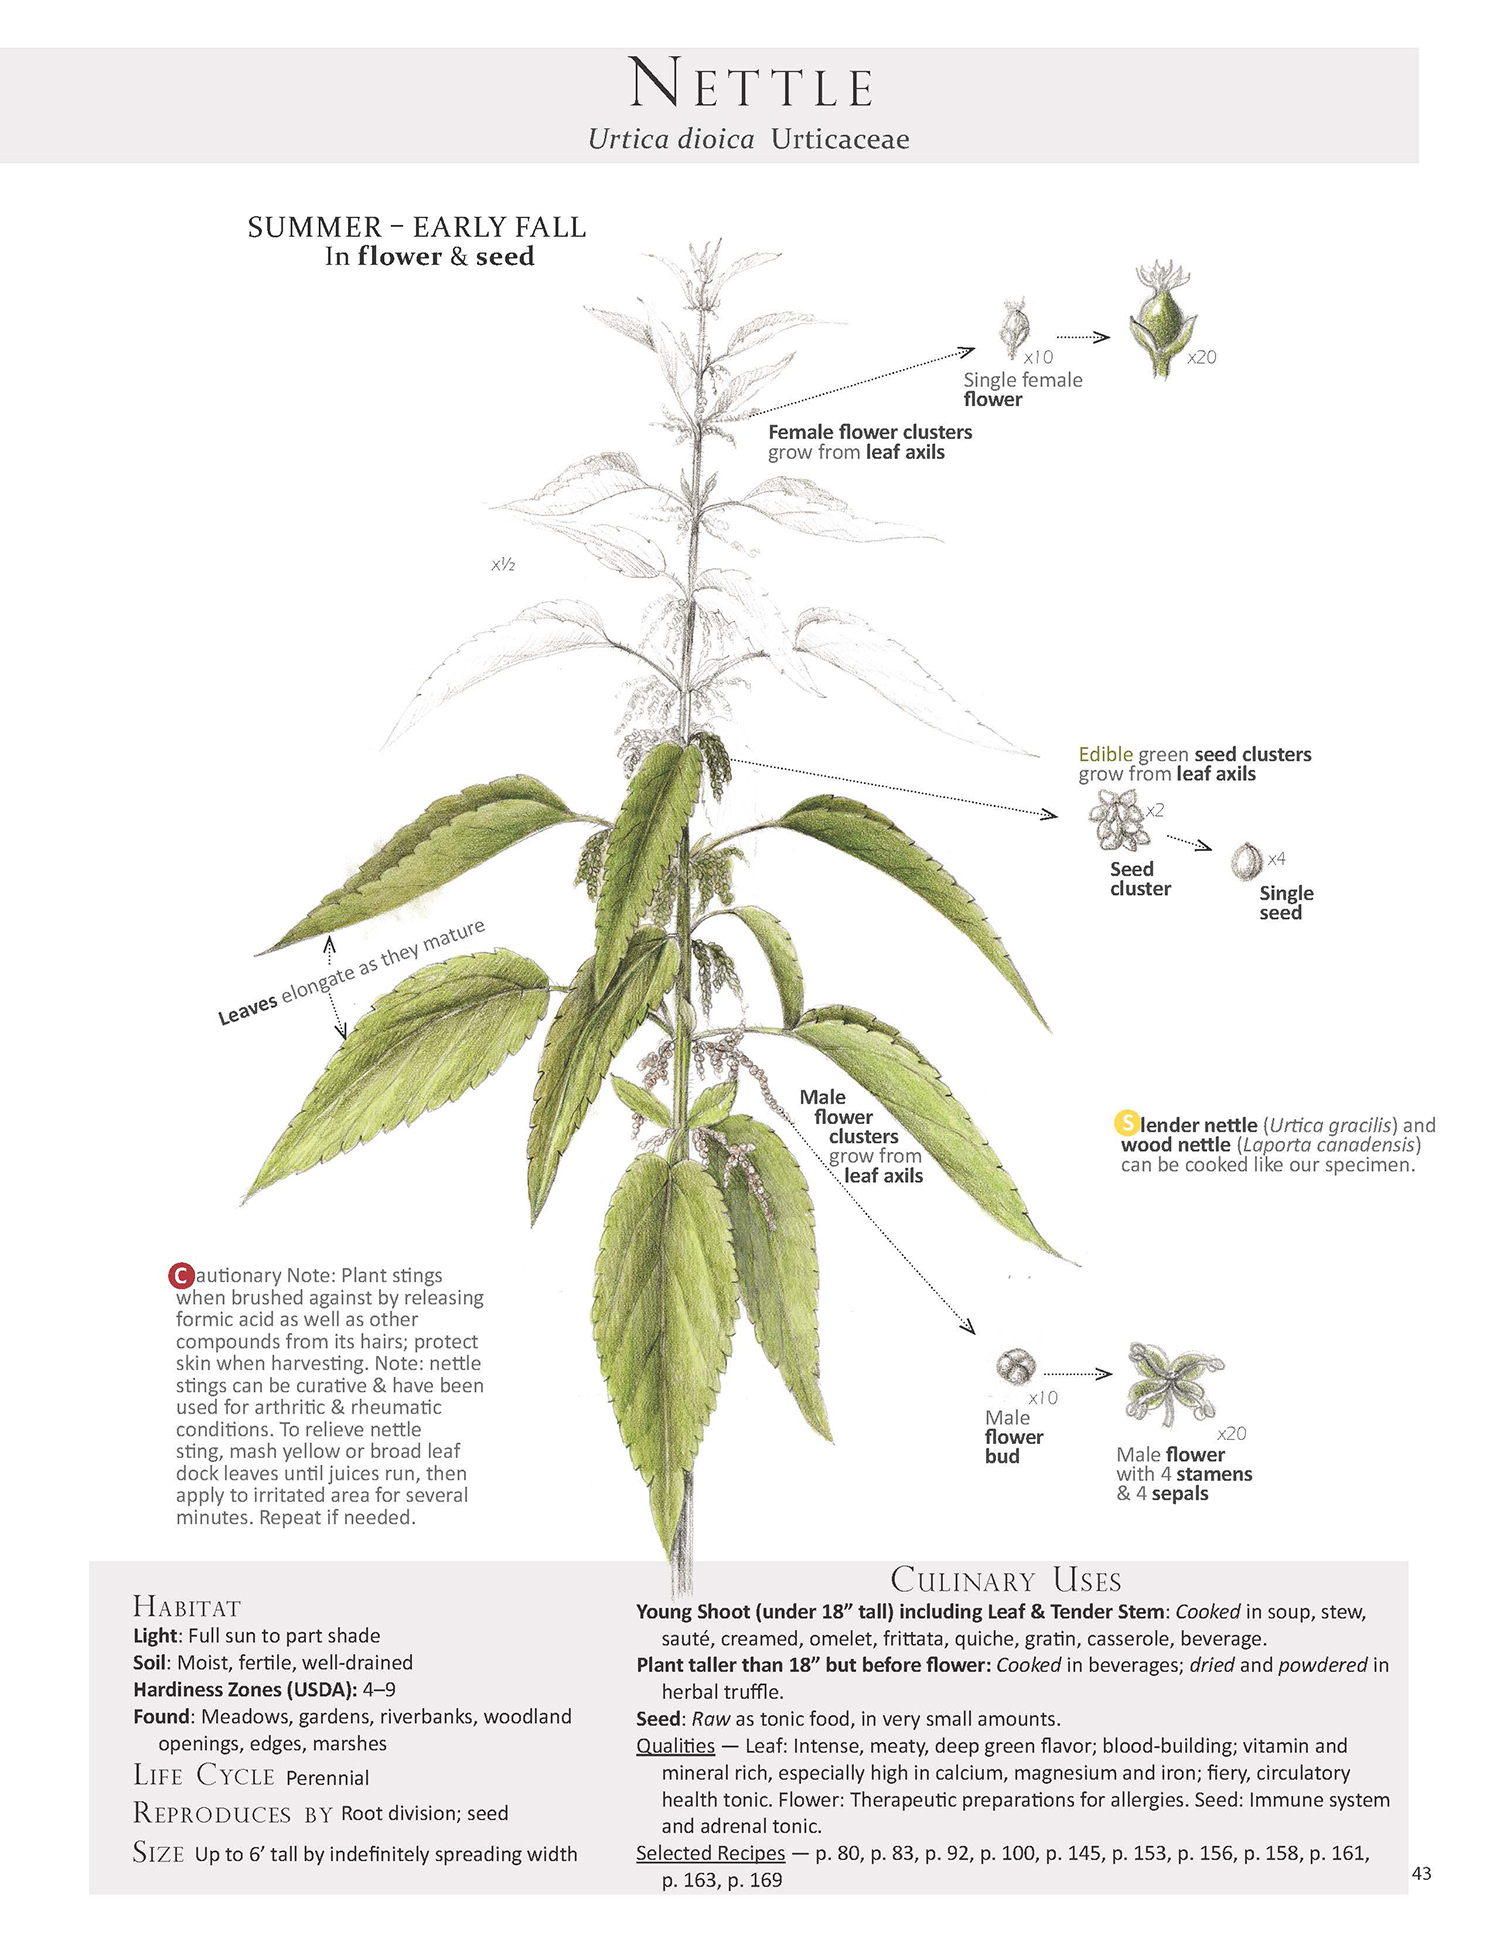
The time of year has arrived for harvesting nettle seeds (Urtica dioica). The seeds of this perennial are considered a super food with adaptogenic properties. This means they help the body handle stress... all kinds of stress, by supporting adrenal function. Dosage: 1/2–1 teaspoon of fresh or dried seeds sprinkled into salads, soups, stews, etc. The seeds taste mild with a crunchy texture and can be easily added to dishes. Amazingly, some herbalist are finding the seeds help heal damaged kidneys — wow! Here is to a wild, invasive, highly useful medicinal food. FYI, may be very stimulating/energizing to some folks, so best to eat earlier in the day. Enjoy! Image from our book Foraging & Feasting: A Field Guide and Wild Food Cookbook. Check this link for more info on nettle seed.
One of the two nettle pages from the book Foraging & Feasting: A Field Guide and Wild Food Cookbook by Dina Falconi; illustrated by Wendy Hollender .
Today's pawpaw: a visual essay with ice cream option.
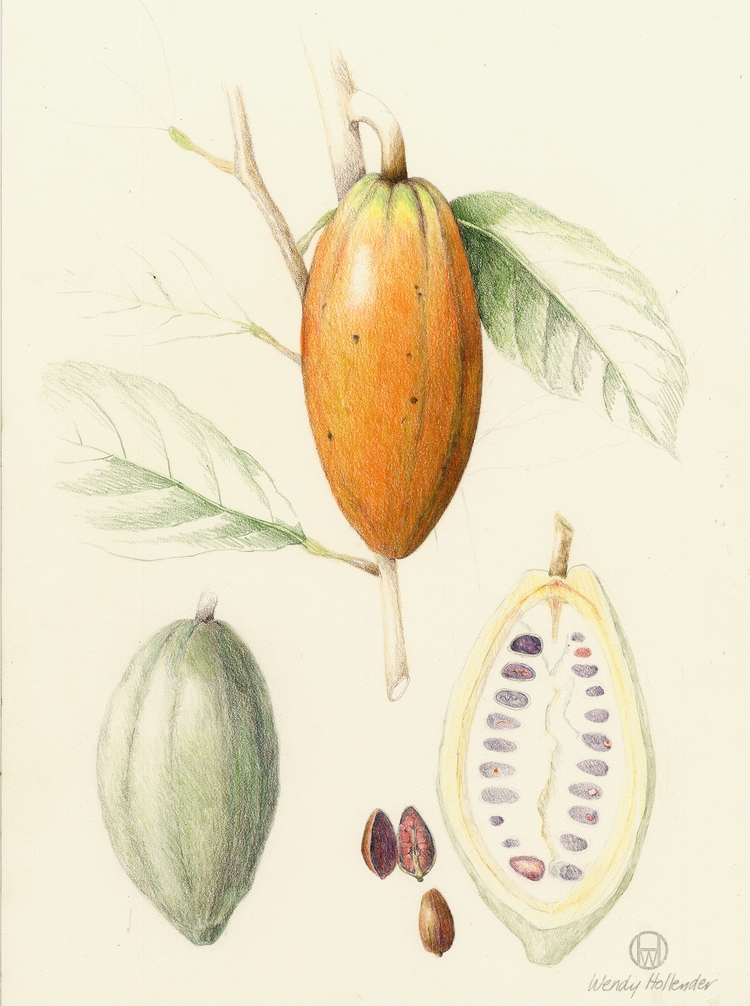
Pawpaw fruit (Asimina triloba) ready for eating as detected by its alluring tropical odor and soft-to-the-touch skin. Notice the color of the skin turns from light green to slightly yellow with a few brown spots when ripe. This is when I prefer to eat them. Note: although not my preference, some folks wait until the skin turns a grayish-brown-black before eating.
A view of the inside of the fruit.
Remove the flesh from the inedible skin with a spoon or your mouth.
The delicious custardy pawpaw flesh is now ready for eating fresh as is; or made into ice cream. BTW, the pawpaw packs an impressive nutritional profile: 3 oz of fruit supplies more than half of our daily iron needs and over a third of our daily magnesium needs! That's a lot of nutrient density for a fruit. Click to see more nutritional information.
Recipe from Foraging & Feasting: Field Guide and Wild Food Cookbook, by Dina Falconi; illustrated by Wendy Hollender
Recipe from Foraging & Feasting: Field Guide and Wild Food Cookbook, by Dina Falconi; illustrated by Wendy Hollender
Now is the time for harvesting and processing black walnut (Juglans nigra of the Juglandaceae family). The green hull will go into organic cold pressed olive for a therapeutic anti-fungal oil-come-salve and the musky-flavored nut meat will go into our mouths. Prized for its wood in furniture-making, this large, native Eastern North American tree can be found growing in USDA zones 4-9. Now is the time for gathering these fallen fruits. Free Food & Free Medicine!
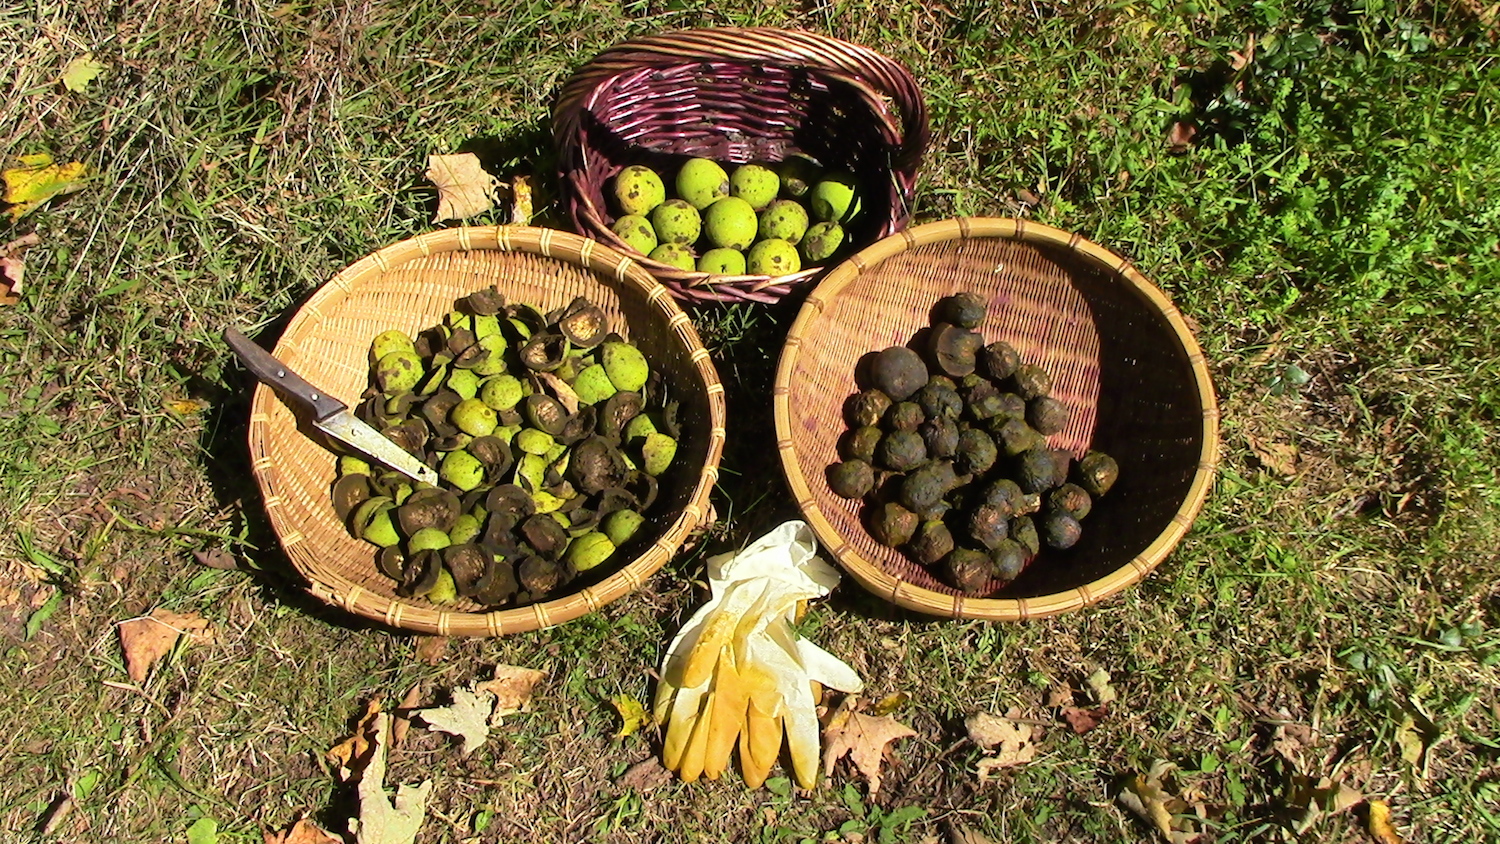
A basket of black walnuts gathered last week from the ground under the tree.
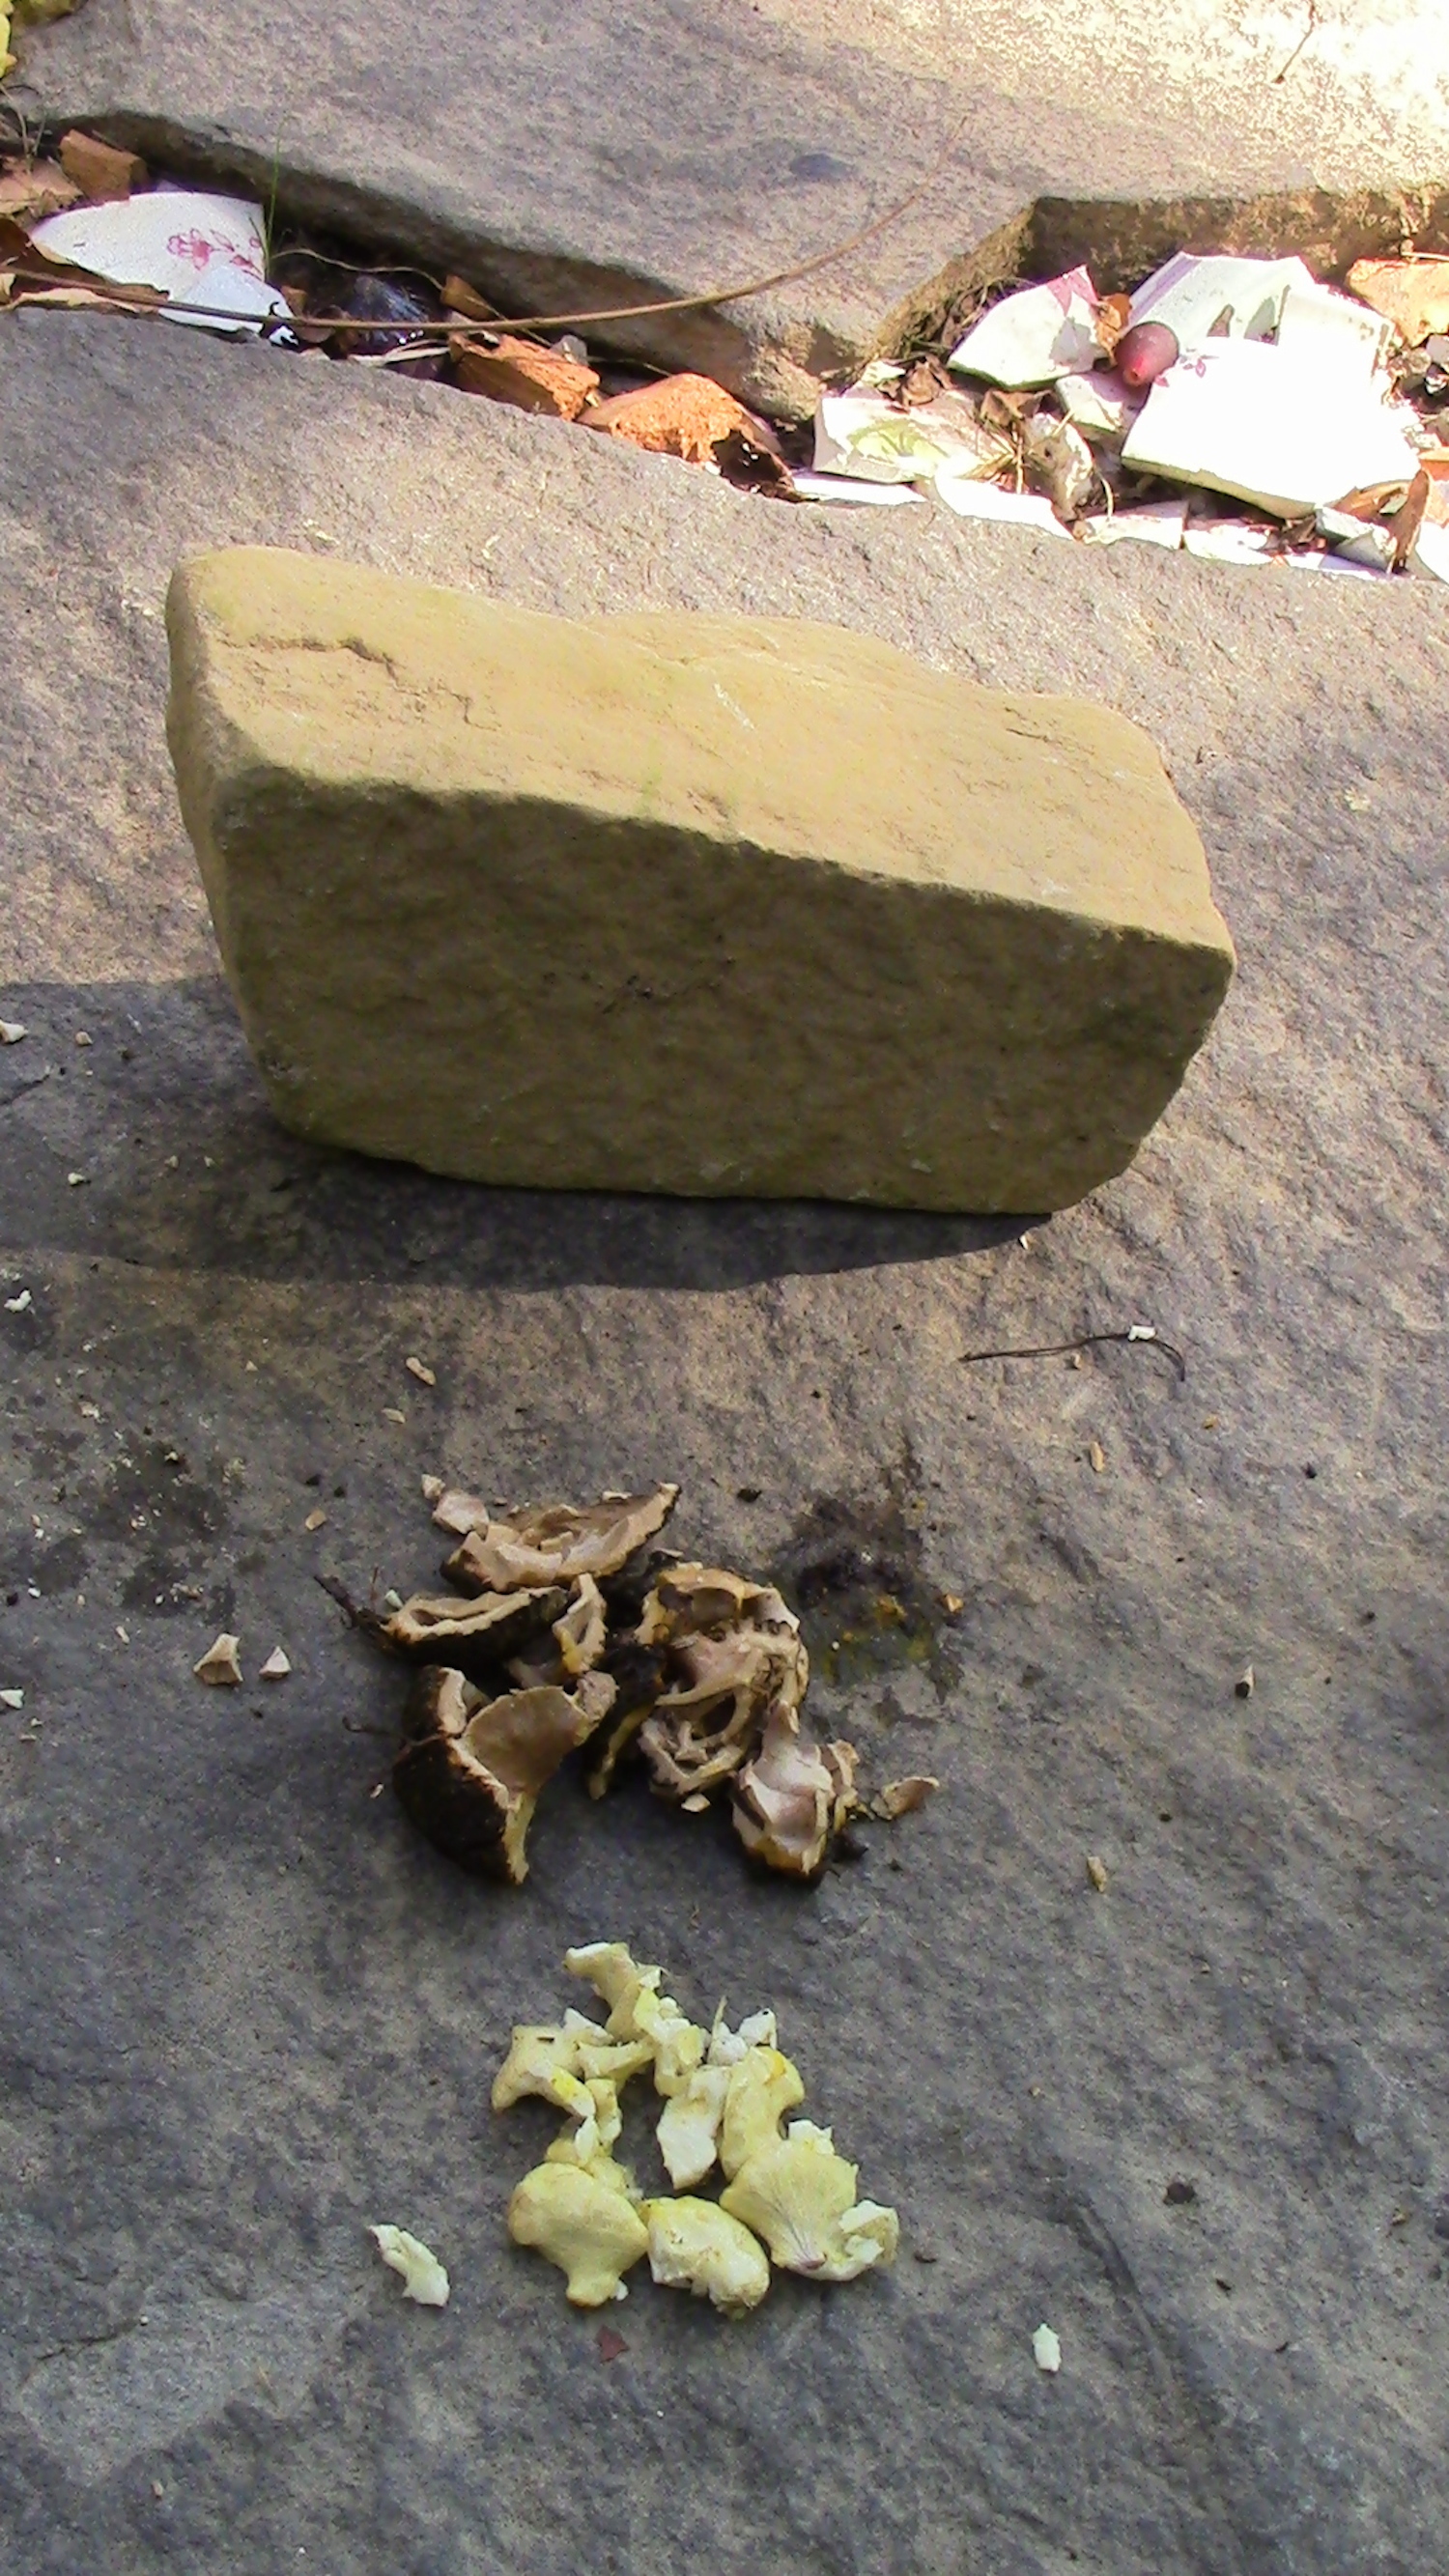
Processing black walnuts: the crime scene.
The green hull removed from the nut shell with a simple paring knife. This part will be used for making medicine. BTW, the green hull begins to brown as soon as it is cut open and comes into contact with the air.
The black walnuts after their green hulls have been removed. At this point they can be spread out and left to dry to be eaten in the future or they can be eaten right away......
Technique: cracking the nut open with a stone. If you want to get fancy, friends of mine who love eating black walnuts own the Hunt's Black Walnut Nut Cracker, available from Northern Nut Growers Association. FYI, even with this tool, shelling the nuts is a slow, meditative affair. An even fancier option is the World's Best Nut Cracker — heavier duty, more expensive, and faster output.
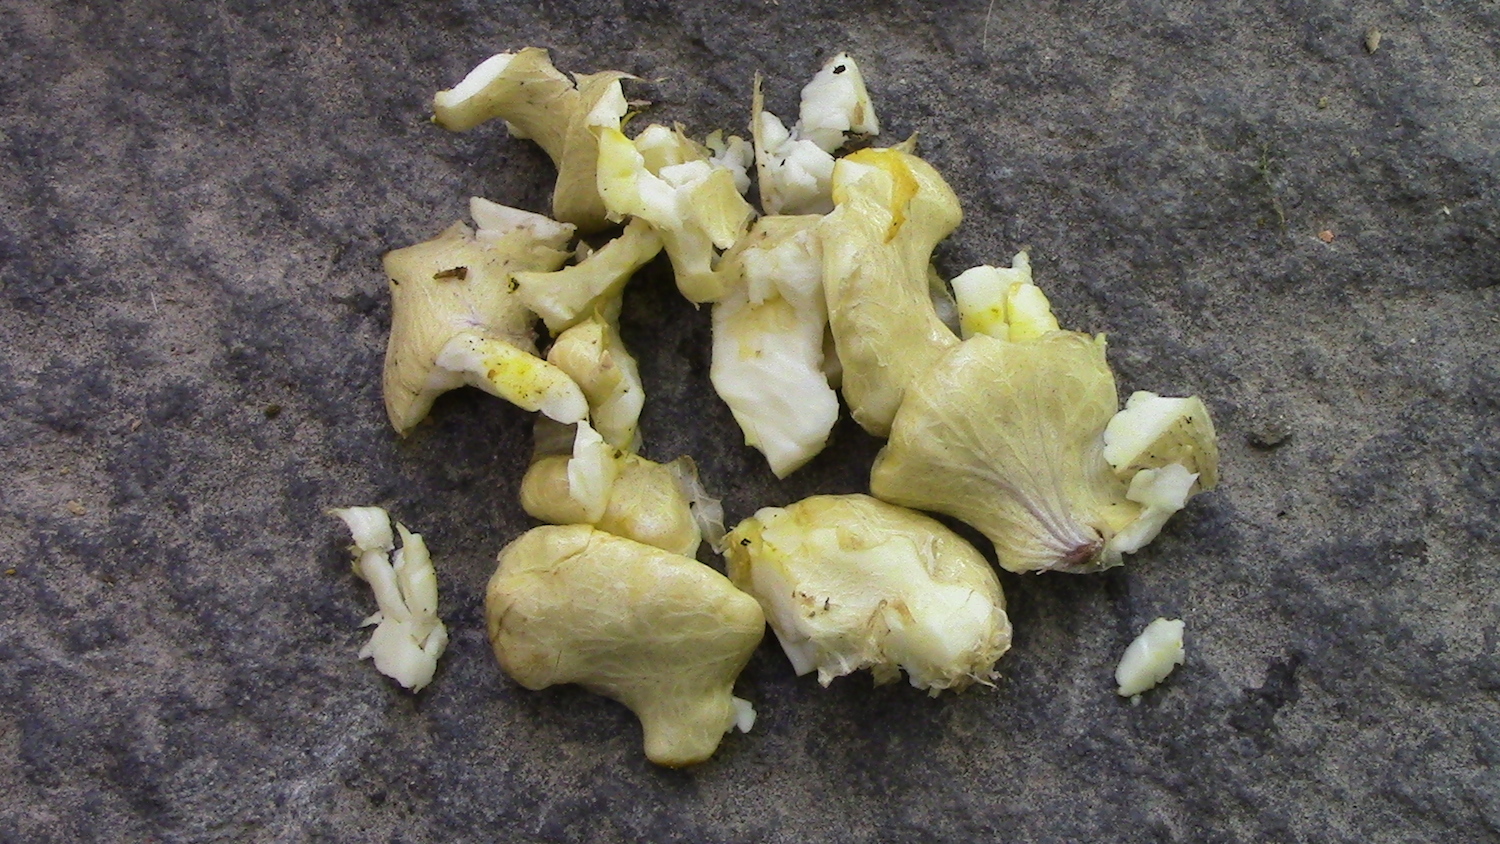
A close up of a cracked black walnut: the white flesh is the edible part and needs to be removed from the shell.
Stone for cracking; nut shell remnants (to compost); and nut meat to eat.
The yellowish-white black walnut meat ready to eat. Can be used instead of other nuts in cooking.
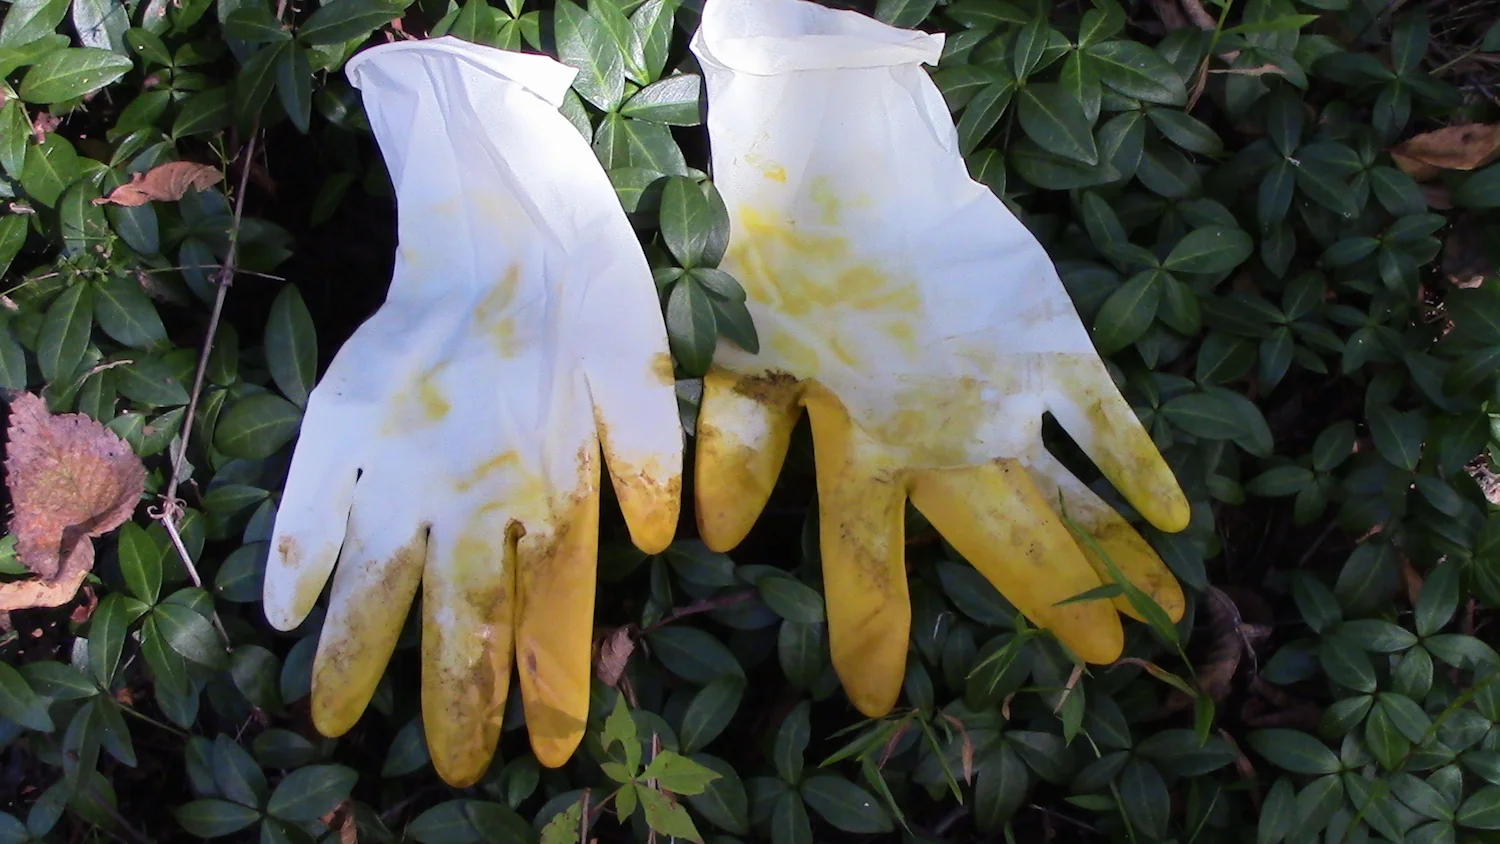
Don't forget to wear gloves when working with black walnuts as they have a strong dye that will stain your hands; the staining lasts up to three weeks.
#RED CLOVER (Trifolium pratense) graces the landscape — time to gather the blossoms for food and medicine = medicinal food. Break up the flower heads and sprinkle the individual blossoms into salads, onto cakes, and as a garnish to beautify any dish. Dry the blossoms for a health-promoting tea; often used for supporting skin and lung health. Flavor is mild with a sweet pea-like taste.